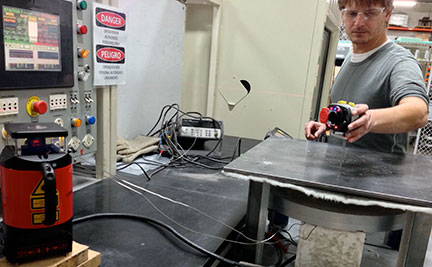
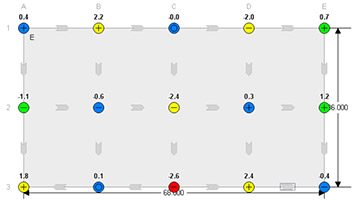
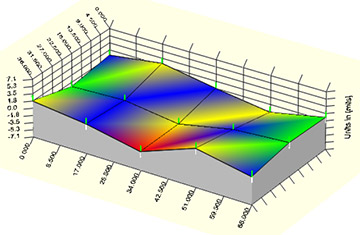
A pump housing must be installed so that the surface is flat and level to the required installation tolerances. Doing so requires great precision and ideally the task would be easy to accomplish.
In the application below, the user needed to perform such a measurement. This task was usually reserved for a separate crew that would bring over optics or theodolites to perform the measurements. In this case, the crew was not available and they needed an accurate measurement that day.
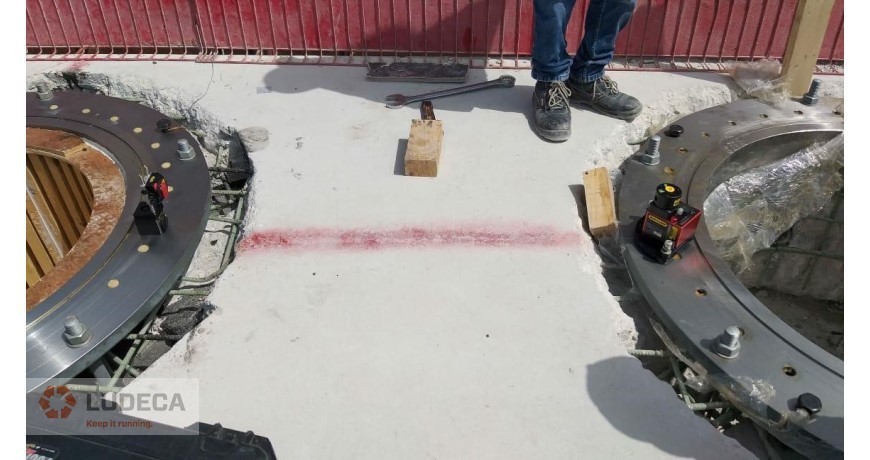
The Easy-Laser E920 system was on hand for a shaft alignment application. This system also happened to have the compact and versatile D-22 rotating laser for flatness and level measurements. In a quick setup, both pump housings were measured by the same person tasked for the shaft alignment. Both flanges were measured and confirmed to have been flat and level to the installation specifications. The modularity of the Easy-Laser system allows for users to accomplish not just shaft alignment, but multiple tasks associated with rotating equipment installation.
by Diana Pereda
The Easy-Laser E970 alignment system makes roll parallel alignment accurate and easy to accomplish. This application requires that the rolls be parallel to each other in term of skew and level. In addition, and very important to the application, is to make sure the slitters and guides are aligned to each other axially on the rolls.
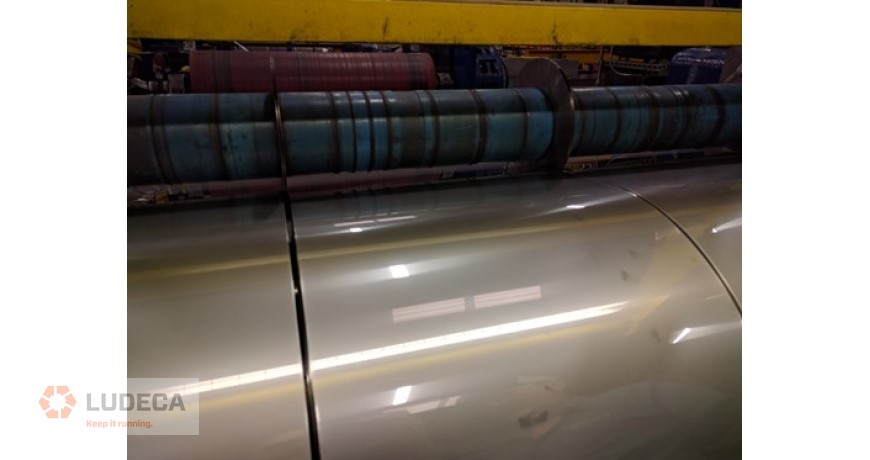
Should they not be aligned, they will cause forces on the guides, causing the product to be affected during the process. The E970 system was set up so that the laser was exactly parallel and level to the reference slitter roll, a process that took about 10 minutes. The laser transmitter was then deflected a perfect 90 degrees for a vertical sweeping laser plane that could be projected down the line.
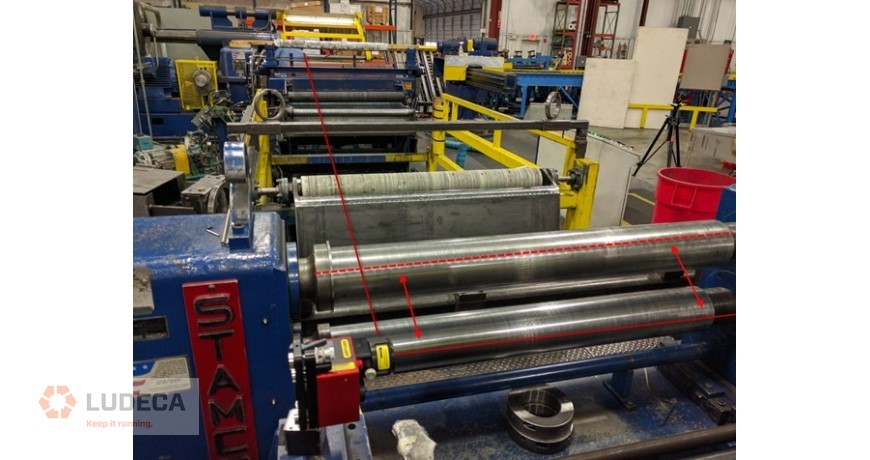
The finding was that the guides were off at some places by as much as 3/8″! Corrections were made live and the appropriate spacers were installed in order to make sure the guides were in perfect alignment with the slitters.
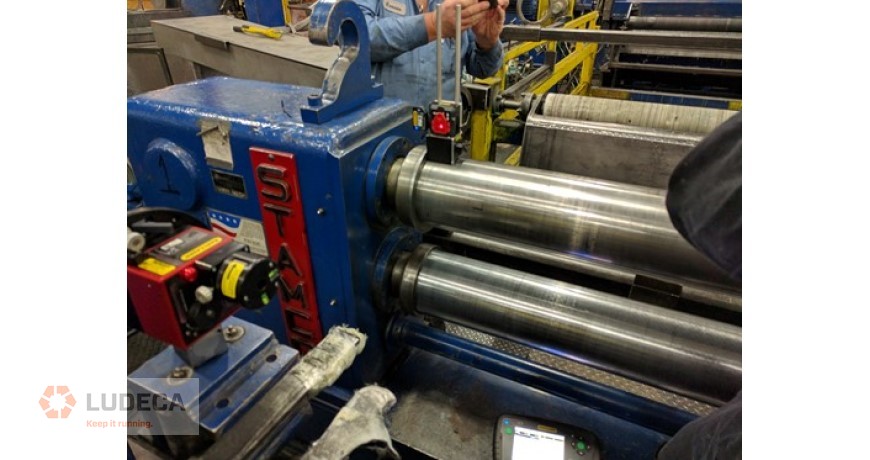
The outcome was that the product produced was of a high quality that had not been experienced on the machine before. A report was generated directly from the Easy-Laser E970 in PDF for documentation.
by Diana Pereda
Marine propulsion alignment consists of ensuring that all bearings and rotational centerlines are set into a straight line as per the installation requirements. Depending on the vessel size, this means the machine, gearbox, clutch, support bearings, stern tube and struts should all make a straight line when the vessel is at sea. Proper propulsion alignment prevents unnecessary loads to the bores and prevents vibration due to back and forth bending cycles of the propeller shaft due to misalignment.
Ensuring this alignment is correct in dry dock is a physically demanding task! Ask anyone that has been tasked to perform such measurements and they will probably have stories of climbing in and out of the stern tube and though cramped spots—“Propulsion Alignment Yoga”.
With all the components that will need to be checked and re-checked after corrections, it is imperative that the alignment system be accurate and easy to use. Traditional marine propulsion alignments involve the use of a tight-wire that is stretched down the length of the propulsion line. While simple in concept, it is not without its woes. If a component needs to be removed, the line must be broken and reset. The wire can bounce due to wind and vibration. Finally, the operator must physically avoid coming in contact with the wire. In many cases, this is physically impossible and dangerous. It is dangerous because if the user was in a stern tube taking a measurement and the line broke, that high tension wire could seriously injure the person in the stern tube!
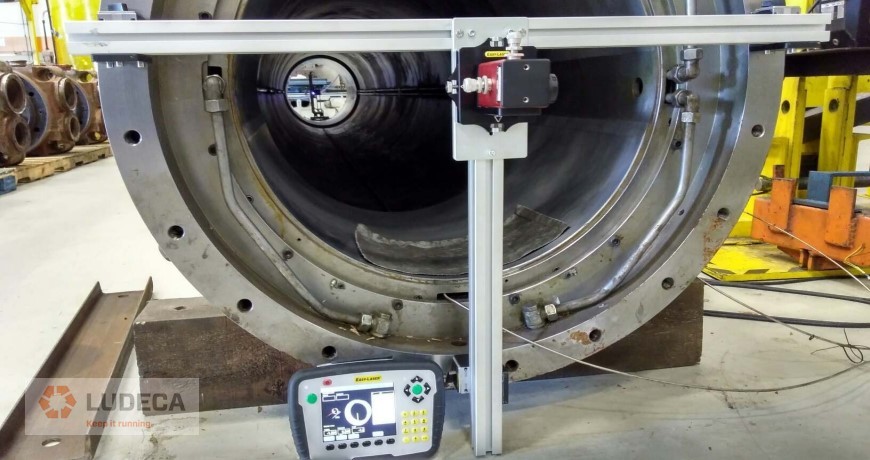
Fortunately, this task is made both safer easier with the Easy-Laser E950B laser marine propulsion alignment system. The concept is simple: the laser beam replaces the tight wire. The high accuracy laser sensor replaces the inside micrometer. The system digitally records the position of the sensor and touch probe with respect to the laser with a high accuracy (0.02mm). The result is quick and easy measurements of marine propulsion alignment. After the alignment is finished, the system creates a report for documentation showing that any alignment defects have been eliminated.
by Diana Pereda
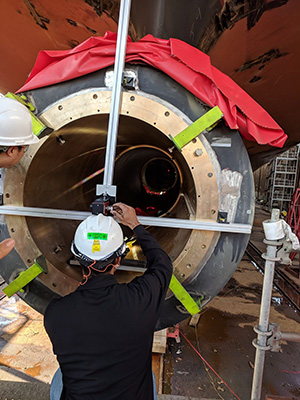
We just returned from performing a stern tube bearing carrier alignment on a large container vessel currently in construction at a leading US shipyard. The one-meter diameter bearing carriers needed to be set to specific tolerances with respect to an established datum line along the longitudinal axis of the ship. Historically, this was accomplished using optics, piano wire and depth gauges. The procedure was time consuming and considering the sizes of some of the vessels being fabricated, performing an alignment was tedious and time consuming work. Sunlight on the hull can cause considerable movement; therefore a faster alignment process would be desirable. Therefore, we were asked to bring in the Easy-Laser E950-B bore alignment system. The quick setup and operation of this wireless laser alignment system made taking bore straightness readings a breeze, saving valuable time on a warm sunny morning in dry dock. The client was pleased with the speed with which the job was performed and the ease of understanding results—a testament to the straightforward design of the E-Series software.
by Yolanda Lopez
In rotating equipment installations, there are many tools employed by the concrete pouring team, the baseplate fabricator, the rotating equipment installer, the pipefitter, the alignment team, etc., to get the job done as effectively and efficiently as possible. “Square, plumb, level, and true” is what allows those teams to work together. “True” means something is exact or accurate. In rotating machinery, true can encompass how accurately equipment is aligned, in flatness, straightness, or rotational centerline (coupling) alignment.
Cutting corners in square, plumb, level and true is non-negotiable. If one team does not hold to this principle, it can cause significant problems for the rest of the teams in the form of delays involved in having to work around and remedy the alignment problem. We’ve heard the stories of machinery installations that have bolt-bound issues, pipes that don’t fit, and baseplates that are warped, many resulting in a need for extreme soft-foot corrections.
These are all symptoms of some part of the installation not holding to square, plumb, level, and true. When all teams abide by this principle of square, plumb, level, and true, the installation will be more efficient, have fewer delays and ensure that no costly rework will be needed to undo incorrect installation.

by Daus Studenberg CRL
Reposted from Easy-Laser®
The efficient manufacturing of today almost always depends on a minimum of downtime. Therefore a spindle crash is a most unwelcome accident. The good thing is that there now are fast methods for checking the machine.
One of the most common things that cause a need for service is a spindle crash. And of course, this always happens when you really need maximum machine availability! Therefore you want the geometry check of the machine to be as quick as possible. Most technicians would be thrilled to use the Easy-Laser® E940 system for measurement and alignment of the spindle, turret, and tailstock back to a precise position because it is so quick to set up on the machine and use. Here’s how to do it:
FIRST CHECK THE STRAIGHTNESS
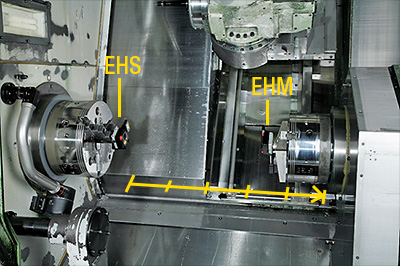
At first, we start to check the straightness of the Z-axis both for tailstock movement and for the turret. Mount the laser transmitter (EHS-unit or D22) in the main spindle and the EHM-unit at the moving part.
If the above measurement is within tolerance, normally 5-10 microns, we can go on with the next measurement.
NEXT STEP, SPINDLE BEARING CHECK
After a crash, you want to know the condition of the spindle bearing. Are the bearings still ok, or should they be changed? The E940 includes a vibrometer and software to listen to the bearing following an ISO-standard presentation/documentation, to give you the answer on how to proceed with the job.
SPINDLE DIRECTION
1. Main spindle to Z-axis (tailstock movement) – analyze the result, which should be within 0.015mm/300mm according to the ISO standard given by the display unit.
2. Carry on with the main spindle to turret movement.
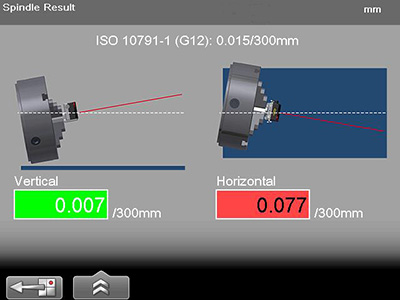
MAIN SPINDLE
The main spindle to tailstock measurement is done by using the EHS-unit and EHM unit.
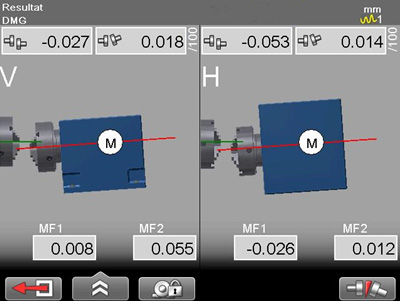
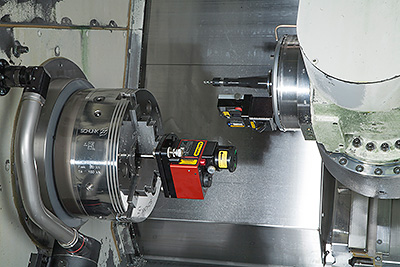
The main spindle to turret check is normally done by using a D22 laser transmitter in the main spindle and EHM-unit at the turret, see below picture:
START MANUFACTURING AGAIN
In a few hours, all measurements and necessary alignment have been performed with full documentation according to ISO-standard. Hopefully, no severe damage was found, and production can start immediately. The machine is back on track, and so are you!
by Ana Maria Delgado, CRL
Reposted from EASY-LASER® blog
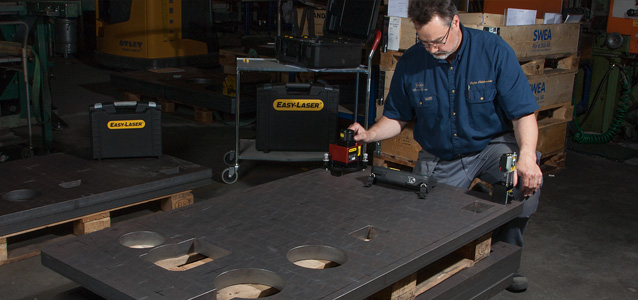
EMBA Machinery is a Swedish manufacturer of converting machines for the corrugated board industry. They acquired a measurement system from Easy-Laser® in 2015. Their machines can be found within the packaging industry all over the world. Thanks to their reliable function, short set-up time and high manufacturing speed, EMBA’s machines are renowned for high productivity and product quality.
WHAT DO EMBA’S MACHINES DO?
Stefan Stålhandske, Production technician at EMBA Machinery, answers:
To put it simply, they supply a sheet of corrugated board with flex-o-graphic printing, before creating slots, punching, gluing, and folding the sheet to produce a flat box. The final packaging has to be of the very best quality, as it is often the first thing you see when you purchase goods. The quality demands mean that the packaging also has to be strong, i.e. the corrugated board has to retain its strength through the conversion process. It must protect the packaged product during transport and handling, and it has to be stackable. It must be able to be produced quickly, and changing over the machines to a different format must also take place rapidly. Some of EMBA’s machine models produce up to 440 sheets per minute. Try to picture that!
THERE ARE STRINGENT DEMANDS REGARDING PRODUCT QUALITY, MACHINE AVAILABILITY, AND MANUFACTURING SPEED. HOW DOES THIS INFLUENCE THE IMPORTANCE OF THE MACHINES’ QUALITY?
The machines are made up of many mechanical parts, both fixed and moving parts in the form of linear guides and rotating components. Many parts are dependent on one another. EMBA places stringent demands on itself and its suppliers. A separate measurement department checks machined components. Installation procedures are based on combined experience as well as generally applied requirements and tolerances. Many machine parts were previously manufactured in our own production premises in Örebro, which entailed a very high level of control of manufactured components and traceability to the machines in which they were produced. We now have a number of suppliers who have to manufacture to the same high level of accuracy, which has meant that we have been forced to develop new procedures and find new control tools.
WHY WAS THE DECISION TAKEN TO ACQUIRE LASER INSTRUMENTS?
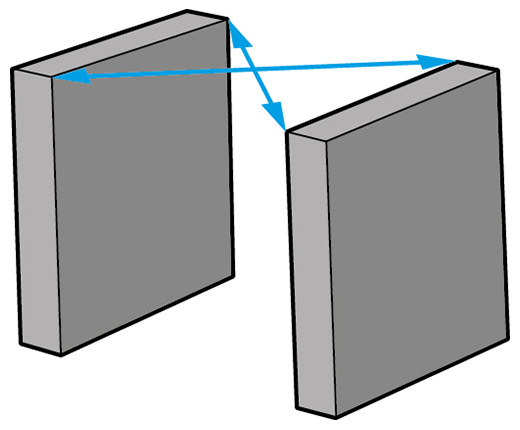
The equipment was principally procured in order to quality-assure and guarantee that all machine units are installed correctly with regard to the alignment of the stands hole center to hole center, as well as with regard to their squareness and parallelism. Previous measurement methods such as cross-measurement and measurement using specially manufactured tools must be replaced to achieve a better method of handling and documenting measurement results. We also considered that the equipment can provide us with the possibility in the future of measuring the entire machine line. Many of the machine components are large and heavy and require a mobile measurement system.
WHY DID YOU CHOOSE EASY-LASER®?
EMBA’s development department got to know the product at an earlier meeting at an industrial fair. The way we were received by Easy-Laser®, along with the versatility the instruments have to offer, made it an easy decision, I would say.

YOU MENTIONED VERSATILITY – WHAT MEASUREMENTS DO YOU CARRY OUT?
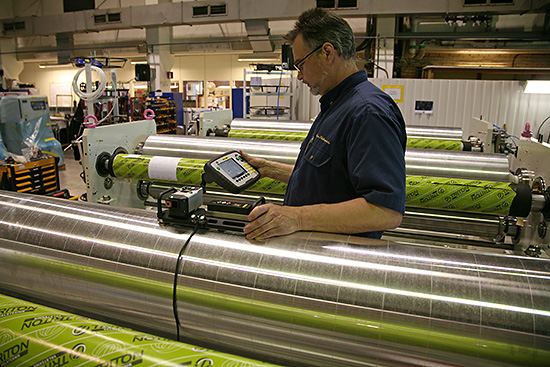
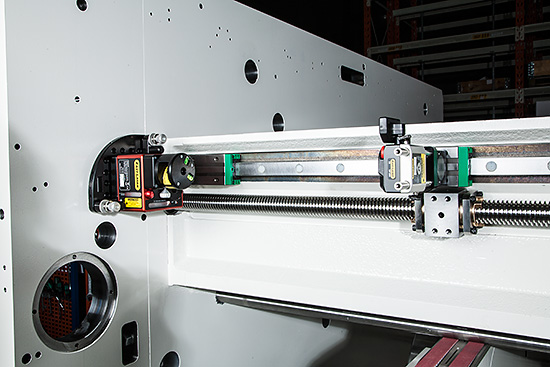
Flatness measurements on large, heavy components, as well as straightness measurements on long beams with linear guides. During installation, we align machine ends with the aid of hole centering/shaft alignment. We also measure straightness and squareness at this time, as well as parallelism between various linear movements. These measurements are performed with an E720 shaft/geo system supplemented with brackets. To measure parallelism between rolls, we have opted to supplement the system with the E975 Roll alignment kit. The instruments have also been used to perform measurements in machine tools and in order to check that diabase surface plates are level. So yes, versatility really is the right word.
HOW HAS KNOWLEDGE OF HOW TO USE THE INSTRUMENTS BEEN SECURED?
The software is user-friendly, but many of the users have never operated this type of equipment before. As a result, two training sessions have been conducted with Easy-Laser®, lasting a total of 4 days. The training has been conducted at EMBA’s premises, in machines under construction. The training, which intersperses theory with practical exercises, was divided up such that the participants began with basic geometrical measurements and hole centering in the first session. During the second session, the focus was on E975 and measurement of roll parallelism, as well as functionality checking of detectors and leveling of laser transmitters.
HOW WERE THE MEASUREMENTS PERFORMED BEFORE AND WHAT ADDED VALUE DOES EASY-LASER PROVIDE?
In some of the measurements, we have replaced devices and dial indicators. The measurements are performed more rapidly using the laser instrument, and if you are unsure of measurement data, it is easy to repeat the measurement. Above all, however, the measurements are more reliable. For example, we have linear guides installed on beams that have to move in parallel with other linear guides installed on other beams. When we measured these before using dial indicators, we were unable to capture local deviations in the same way as now.
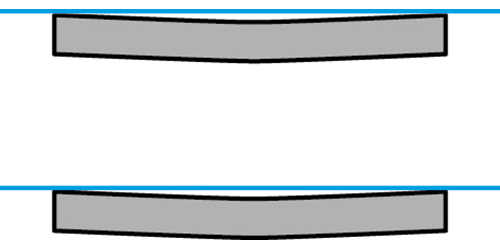
Our laser instrument now gives us the opportunity to pinpoint these deviations as well.
In some cases, earlier measurement procedures have been replaced so that we now measure the machine from different positions instead, which are more relevant for the machine’s conditions. Some measurements have not been conducted previously. The fact that we can now perform these measurements provides us with a basis for discussions with our suppliers and contributes to our work of consistently improving our quality.
EMBA NOW USES THE ROLL ALIGNMENT KIT E975 TO MEASURE THAT THE ROLLS ARE PARALLEL WITH EACH OTHER. WHAT HAPPENS IF THEY ARE NOT PARALLEL?
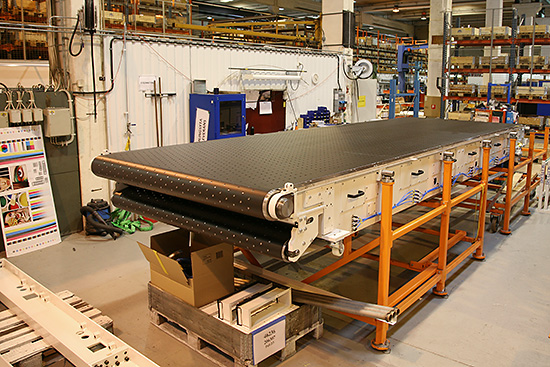
Some of the most critical rolls are located in the printers. If the rolls are not correctly aligned, this can result in the print being positioned incorrectly on the package, which is unacceptable. If the feeder table is not aligned with the machine line, this results in a crooked printed image, slanting slots, slanting punching, and a folding result that is outside of the stipulated tolerances, all of which are also entirely unacceptable. As EMBA’s machines are renowned for their good range of formats as well as their high machine speed, the machine alignment from unit level to the overall machine line is an important aspect in achieving a good end result, i.e. a perfect box.
HOW WAS ROLL PARALLELISM CHECKED PREVIOUSLY AND WHAT IS THE ADVANTAGE OF E975?
When building units, we relied on the cross-measurement method as well as level with the aid of a precision level. The cross-measurement method is difficult, as access to reference points can be difficult or non-existent. When installing machines, we rely on specially manufactured spacers between the units in order to achieve parallelism as well as precision levels for leveling. Where possible, we can use tape measures to take measurements covering two separate rolls. With the laser instrument, we have the potential to measure all or parts of the machine, in order subsequently to monitor any adjustment of rolls in “live” mode.
DURING SHIPPING, YOUR MACHINES ARE SPLIT INTO SMALLER UNITS IN CONTAINERS AND ARE REASSEMBLED ON-SITE ON THE CUSTOMER’S PREMISES. THIS MUST PLACE GREAT DEMANDS ON YOUR TECHNICIANS?
Absolutely! Prior to handing over to the customer, we perform tests in accordance with a special test protocol. The tests are performed under production-like conditions, for example with measurements being taken regarding register variations in the positioning of printing, slots, and punches. The position of printing, slots, and punches must be able to be repeated within the tolerances, regardless of machine speed. In the future, new measurement methods with the aid of the newly acquired laser instrument will ensure better control of the machine set-up, which ought to generate a faster and safer start-up of production in the EMBA machine.
Thank you Stefan for giving us the opportunity to hear how you use Easy-Laser®!
by Yolanda Lopez
Steam turbine internal alignment applications require high precision, ease of use, and reliability. The Easy-Laser® E960 system is used to align diaphragms and internal components and delivers all these things.
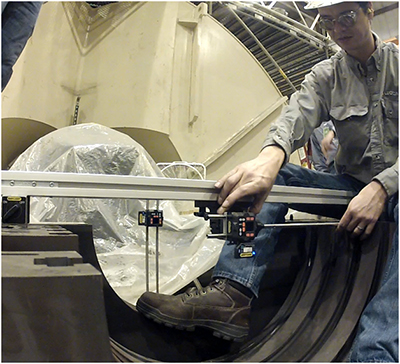 Setup is fast and simple. There is no need to precisely center your detector to the bore or the laser to the rotor to perform position checks. Simply orient the sensor into laser range, and the display unit does the rest to calculate the center. Your rotor positions are entered digitally for greater accuracy and speed of setup. Wireless components streamline the setup—no cables to get in the way!
Take three points over 180 degrees on a bore just as you would with a tight wire, or use the multipoint measurement to find the center of bores and check for ovality.
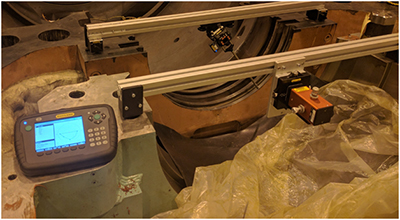
The Easy-Laser E960 features an optional reference control sensor for greater reliability and precision. No more guessing whether your reference line (the laser beam), moved during measurement—you are in control of its position at all times. Even if the beam moves over time due to environmental factors, the reference control sensor allows the system to automatically adjust for such movement to ensure all your readings stay highly accurate.
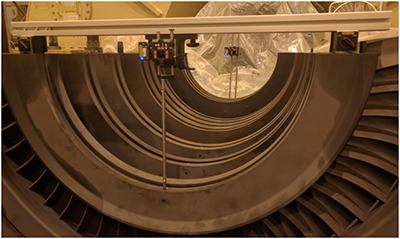
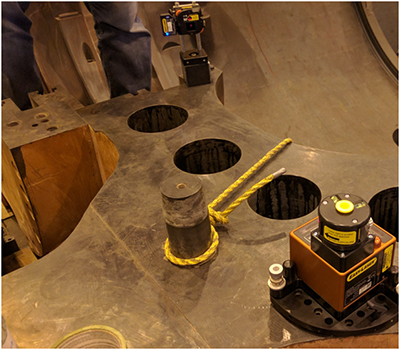
Need to measure the flatness of the shell? Simply add the D22 rotating laser and flatness readings can be taken using the same sensor as the one you use for internal bore alignment. Both the top and bottom shells can be measured without having to remove the bolts.
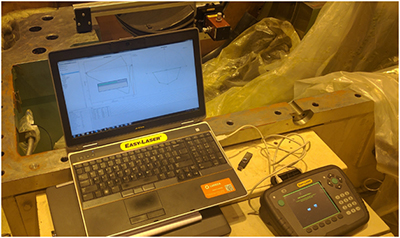
This system works with your existing processes. The Easy-Laser E960’s intuitive display allows for entry of diaphragm positions into your excel spreadsheets or takes advantage of the included Easy-Link software to present, process, and document the turbine alignment in one complete and easy to use package.
by Daus Studenberg CRL
Problem: The machine shop of the engineering department of a prestigious Florida university wanted to identify the source of error in their tool room lathe. They had previously observed that when working pieces further away from the spindle chuck, there was an appreciable deviation in accuracy compared with close-to-the-spindle work.
The machine shop instructor suspected the problem to lie somewhere in the tailstock and asked us to confirm or refute his suspicions.
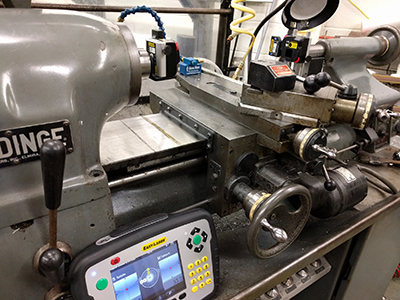
Solution: The Easy-Laser E940 Machine Tool laser alignment system was used to perform three types of measurements:
- Z-axis straightness measurement
- A spindle direction measurement
- A spindle-to-tailstock alignment measurement
In addition, the Values program was used to check for play in the tailstock sub-spindle bearings. An additional check was performed to verify whether the tool support returned to its original position when it was unlocked, and then locked again.
After accomplishing the above measurements and checks, it was determined that the straightness of the Z-axis was within tolerance, the spindle direction was ascertained and the alignment between the spindle and tailstock at the furthest distance revealed a small angle. There was no significant play in the sub-spindle bearings and the tool support check was good.
This data allowed the instructor to narrow down the possible corrective actions to take in order to achieve a better alignment and return the lathe to an optimum performance condition.
The ability to perform all of these checks and measurements to a high degree of accuracy allowed the university to quickly and more certainly identify worn components, which will save them a great deal of money in spares costs, as well as ensure that parts and workpieces fabricated on this lathe will turn out as expected, on time and within design tolerances.
by Oliver Gibbs CRL
In today’s world, video platform is the way to accomplish effective visual knowledge and a learning mechanism in many organizations. With the use of video, one not only is able to promote products and services but one can also strengthen a culture and demonstrate how-to scenarios easily and quickly.
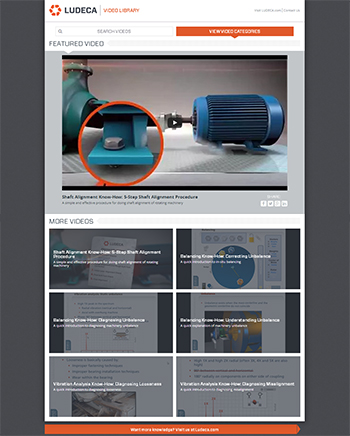
LUDECA believes in communicating visually to help customers educate and train their personnel on precision skills. For this reason, we are pleased to announce the release of our new microsite www.LudecaVideos.com, which features a Shaft Alignment Know-How series plus a Know-How series for Vibration Analysis and Balancing. The video site features basic terminology, fundamental concepts, advanced measurements as well as product demonstrations. The videos are indexed by category but also searchable by keyword.
We felt there was a need to go back to basics and help educate on precision skills and related technology to improve asset reliability. Following the Uptime Elements™ holistic approach to reliability, alignment and balancing are key components of your asset condition management (ACM) program. We are happy to offer these videos to our customers for their personnel to access and for use in their training programs. We hope this content assists them and others in either improving their reliability program or in getting one started and leads to world-class reliability programs,” —Frank Seidenthal, president of LUDECA.
We encourage you to visit www.LudecaVideos.com and see for yourself the value behind each video.
by Yolanda Lopez
A microchip manufacturer in the United States utilizes circular aluminum plates approximately 2 to 3 feet in diameter in the manufacturing process. These plates are heated from ambient temperature to +400 degrees F. The manufacturer wanted to ascertain if any distortion would exist across the surface of these plates when hot and if any differences in the flatness of the paste would occur between the cold and hot conditions of the plates.
To measure this accurately, a ROTALIGN® ULTRA iS with LEVALIGN® EXPERT flatness option was used. The customer fabricated a steel jig to go over the aluminum plate. The jig was insulated from the bottom (see Figure 1.)
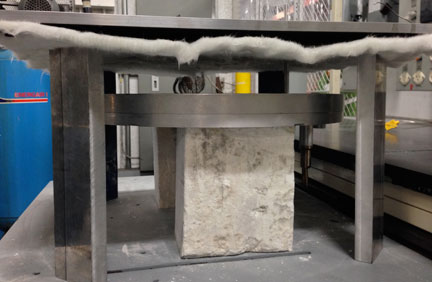
Fig. 1: Steel fixture with insulation placed over Circular Aluminum plates
9mm holes +0.002″ were pre-drilled through the steel jig to allow the Levalign plunger bracket to fit freely yet snugly through the holes and make contact with the aluminum plate underneath. A standard circular measurement pattern was selected. The ROTALIGN ULTRA iS sensor was mounted on the plunger bracket to obtain the readings (see Figure 2.)
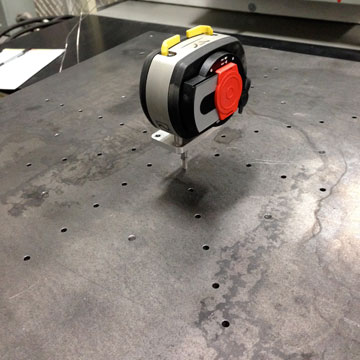
Fig. 2: ROTALIGN ULTRA iS sensor mounted on LEVALIGN flatness plunger bracket through holes in a steel jig
All readings were repeated to within 0.0001″ and fell within 0.0001” of what the customer thought they were. A thermal expansion of 0.020″ was measured from hot to cold, although the plate remained flat to ±0.002”. Figure 3 shows the measurements being performed.
Fig. 3: LEVALIGN EXPERT on the left and ROTALIGN ULTRA iS sensor during measurements
Although the original method used to perform these measurements was not disclosed to us, the customer did tell us that the ROTALIGN ULTRA iS with LEVALIGN EXPERT saved them many hours in the measurement process, and although no dollar savings from this process were mentioned, the customer immediately purchased the ROTALIGN ULTRA iS with LEVALIGN EXPERT, without hesitation.
by Steve Lochard CRL
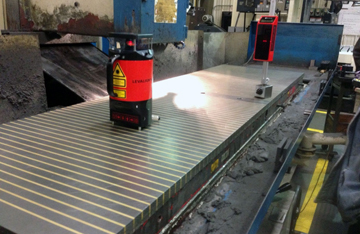
Milling machines are an essential tool in any machine shop and their calibration is equally important. The quality of the parts made by a mill depends on two factors: one, the skill of the machinist, and two, the condition of the equipment used. The bed of the mill can sometimes be overlooked, and imperfections in it can cause quality issues in the tolerances or finish of parts produced. Out-of-flatness or levelness is one of the main causes of product imperfection. The bed is the machinist’s surface of reference and a quick and simple Levelness/Flatness check can ensure that the bed is in optimal condition to allow the machinist to create high precision parts.
by Carlos Bienes CRL
The Problem: A cement manufacturer requested the measurement of the flatness and levelness of a gearbox foundation to determine its condition. The problem was that the gearbox had to remain in place during the measurement. This type of measurement would present itself as an impossible task due to the fact that most flatness measurement methods require some type of line of sight in order to measure each point.
The Solution: The LEVALIGN® EXPERT automatic rotating laser along with a sensor and a dedicated computer was used for this geometric measurement task. The LEVALIGN EXPERT “InfiniSplice” function allowed for multiple measurements to be merged. For this application, only 3 separate measurements were taken where the laser was moved each time. The operator needed to make sure that each measurement file had at least 3 points in common with the previous measurement file. The LEVALIGN software then automatically merged each file to create a master measurement.
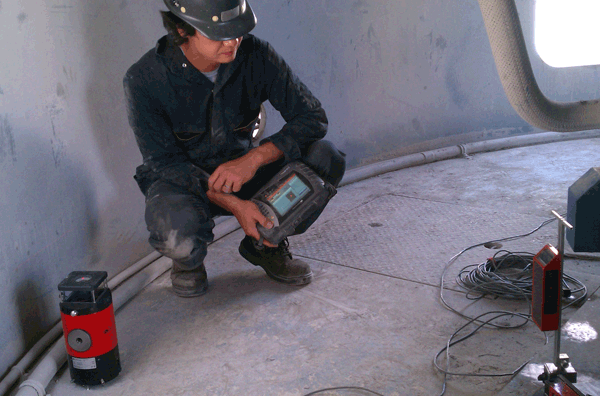
The Result: The whole measurement process took about 15 minutes to complete from start to finish. The result was an accurate measurement that assessed the condition of the base while preventing the need for the gearbox (that was in the critical path of production) to be removed.
by Daus Studenberg CRL
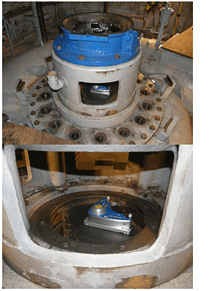 A contractor from Spokane requested a bore centerline alignment of a vertical hydro turbine in northern Idaho. After receiving more detailed information and visiting the site, it was determined that this task would be possible using a combination of the CENTRALIGN® ULTRA STANDARD (a bore laser alignment system) and the LEVALIGN® laser (a laser for flatness and squareness measurement).
Download the Vertical Turbine Bearing Alignment case study.
by Ana Maria Delgado, CRL
On a recent alignment consultation, we were requested to verify the straightness of a stern tube on an oil tanker. It is critical that the stern tube be bored so that it matches the line of the propulsion shaft that will be passing through the center of it. The reason is that the next operation will involve the hydraulic insertion of Babbitt bearings into the stern tube. It would be a very costly operation to undo this is if it were not done correctly the first time.
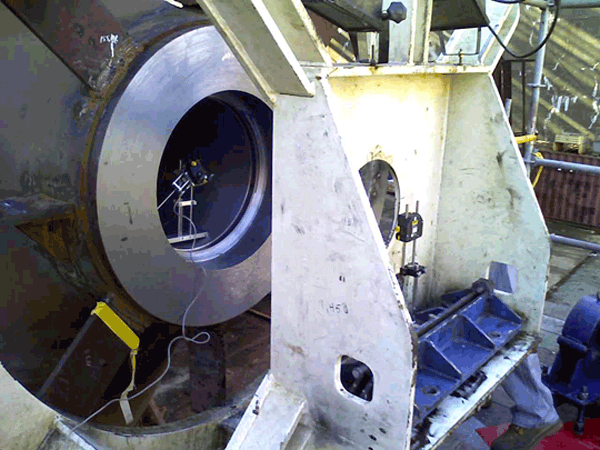 Upon arrival, the customer’s engineer on site noted that the surface was just machined, but not prepped for accurate measurement by the removal of burrs and machining marks. He wondered if this would affect our measurement. We told him that it could affect any bore measurement, but some unique features of CENTRALIGN® ULTRA would let us know if it did. CENTRALIGN ULTRA offers the following to perform this job AS-IS:
- Single point bracket –The single point brackets are designed to give extremely accurate readings that are independent of the user’s skill and ability. Springs consistently position the plunger on each point around the bore – accomplishing a more accurate translation of the bore surface to the sensor. The result is a true measurement of out-of-roundness and averaged surface finish.
- Standard Deviation – It takes a minimum of three points on a bore to obtain its center position with tightwire, laser, or optical bore measurements. CENTRALIGN allows for more than three points to be taken. With this, the points can now automatically be fitted to a virtual circle that can reveal not only a center position but also the quality of the measurement. In essence, Standard Deviation lets us know, “Is what we measured round? If so, on average, how round was it?”
If the measurement had a low Standard Deviation, then we would know the bore that was measured was round. If a nick or a burr was accidentally measured or if the surface finish was rough, you would see higher Standard Deviation results. It turns out there was no need for any further surface preparation as CENTRALIGN indicated that the measurements were excellent and the single point bracket had not measured on a nick or bump. Standard Deviation was under 0.5 thousandths and repeatability averaged 0.2 thousandths per measurement. The entire measurement took under 1 hour from arrival to departure of the job location.
by Daus Studenberg CRL
 Our LEVALIGN® EXPERT Flatness and Leveling Measuring System with an Automatic Rotating Laser has been selected by the subscribers to Plant Engineering magazine as a winner in the 2011 Product of the Year Awards. The annual Product of the Year recognition, now in its 24th year, is the manufacturing and engineering industry standard for new product achievement.
Winners are selected by a vote of qualified Plant Engineering subscribers – the engineers who buy, specify and use these products on a daily basis. They are the most qualified people you can find to understand how new products reduce energy costs, ensure safety and improve productivity on the manufacturing plant floor. That’s why the Plant Engineering Product of the Year award is so highly regarded in our industry. —Bob Vavra, Editor of Plant Engineering magazine
The Product of the Year awards will be presented at the 2012 Awards Dinner, presented by Plant Engineering and Control Engineering, to be held next March in Chicago, Illinois.
LEVALIGN EXPERT is manufactured by PRÜFTECHNIK Alignment Systems.
by Ana Maria Delgado, CRL
MEDIA RELEASE: New Product Revolutionizes Flatness Measurements
 The LEVALIGN EXPERT Flatness and Leveling Measuring System with Automatic Rotating Laser has won 1st place in Pumps & Systems Product Innovation of the Year competition. The winners, finalists and honorable mentions were chosen by the magazine’s editorial advisory board.
“This year’s winner is LUDECA, Inc. LUDECA’s LEVALIGN EXPERT is a tool that allows end users to determine the flatness/levelness of bases and frames. It helps avoid strain that can occur when a machine is bolted to a distorted surface. With a level surface, problems such as vibration and misalignment can be avoided, saving money on maintenance and repair and avoiding downtime.” —Pumps & Systems, December 2011.
Read official announcement including a LEVALIGN EXPERT field service engineer testimonial.
LEVALIGN EXPERT is manufactured by PRÜFTECHNIK Alignment Systems.
by Ana Maria Delgado, CRL
Problem: A machine base needs to be checked to see if it is flat and level.
Solution: A digital inclinometer provides fast and accurate measurements of the foundation.
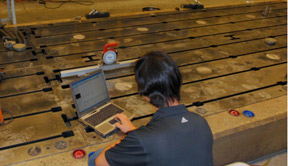
When installing on machine bases, the spirit level is a commonly used measurement tool assigned to this task. Although the accuracy of the spirit level can be within the level tolerance specifications, it does not provide the degree to which levelness is out of tolerance. In essence, it provides a “pass/fail” verification instead of exact numbers for inclination. See Figure 2 below.

Furthermore, level measurements can vary depending on where the measurements were taken. If a part was measured to be level only from end to end, it may not necessarily be level or flat through its middle. The INCLINEO® takes the concept of the bubble level and brings it to the next level to make it ideal for machine base measurement. The INCLINEO is a high precision (0.0003° resolution) digital level. Because it is digital, it provides numerical readings. It can provide angular readings (degrees, arc seconds, etc.) as well as elevation readings (mils/inch, mm/m, etc.). It uses wireless communication to interface with the software on your PC to map out the foundation measurements in 3D.
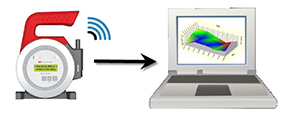
So how does the INCLINEO work for both flatness and levelness? INCLINEO works by taking level measurements between two discrete measurement points. The level measurements are automatically merged in the software.
By taking this concept and now applying it as a grid over the part to be measured, the levelness and flatness can be determined.
Taking measurements is as simple as “Dimensions, Measure, Results”. First, the dimensions of all the points of interest are entered into the ALIGNMENT CENTER software.
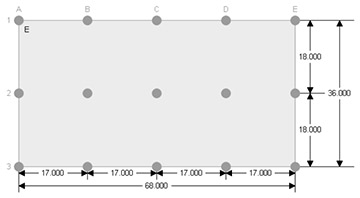
Second, measurements are taken by placing the INCLINEO between the points of interest. The measurements are wirelessly transferred to the PC. It is even easier to use than a bubble level, with the added benefit of giving you exact readings.
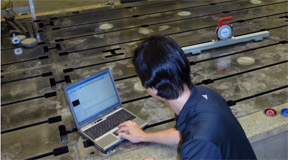
The extended range base is ideal for this application because it allows contact points to rest exactly on the points to be measured. The self-calibration feature of the INCLINEO allows the extended range base contact points to be moved in or out through the measurement. As an added bonus, the self-calibration also cancels out any effect of bar sag, thus giving you dependable level measurements.
Finally, the software displays a 2D or 3D elevation plot of the foundation immediately after the last point is measured. There is no more guessing and checking about what your foundation is doing. Select the report option and instantly view how flat and level it is. Numerical results and color-coordinated tolerances will automatically display what needs to be corrected and by how much. Problem solved!
by Daus Studenberg CRL
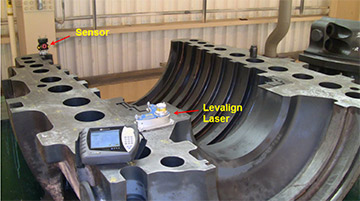
Recently, a flatness measurement was needed on two halves of an HP turbine shell using the LEVALIGN® system. The top half (resting upside down) was a typical quick and easy measurement, as shown below in Figure 1:
The second half was not so typical. The studs had to remain in the shell and the customer wondered if our tool could still take the measurement with the line-of-sight obstructions for the laser from the studs. The answer was YES!
The unique “InfiniSplice” feature of the LEVALIGN allowed for this to happen without having to resort to custom brackets to shoot over the top of the studs. InfiniSplice allows for multiple sets of measurements to be combined into one unified measurement. This is based on the concept that two sets of measurements can be unified or merged if they have three or more points measured in common.
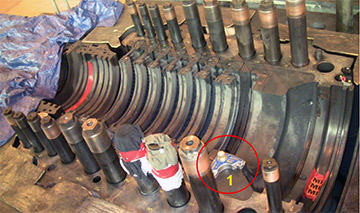
It’s simple. Just measure as many points as you can with the LEVALIGN laser emitter in the first position. See Figure 2.
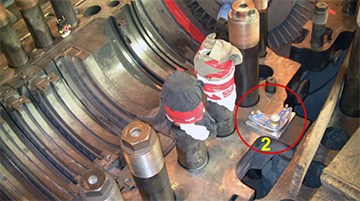
Then move the laser to another position and measure any points you couldn’t measure with the first measurement setup plus at least three points that you did measure with the previous setup. See Figure 3.
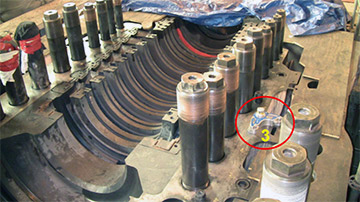
Now move the laser yet again, and repeat measuring the remainder of the points plus three points from either the first or second measurement. See the third setup in Figure 4. This process can be repeated as many times as needed, hence the term “InfiniSplice”.
Just open all three (or more) files in the ALIGNMENT CENTER software and they are then instantly combined into one unified measurement. No need to select the splice points, the software knows which ones to use. If you can open three files, you can instantly splice them. It’s just that simple.
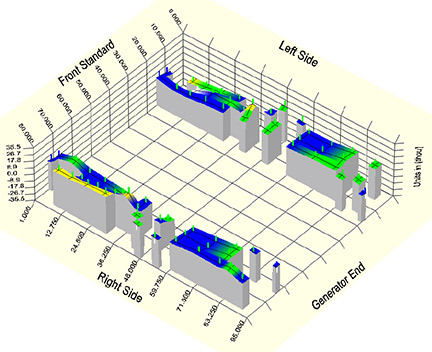
Figure 5 shows the combined flatness profile of the lower half of the turbine casing, taken in spite of the obstructions presented by all the studs.
by Daus Studenberg CRL
In December 2009, an aerospace industry service company in Florida was presented with an unusual challenge. A furnace that had exploded was believed to have suffered severe deformities at the mating flange surface. They were now faced with the task of determining whether or not the furnace flange was flat. LUDECA was contacted for assistance in determining whether or not the flange surface was still within allowable tolerances prior to the unit being rebuilt. Upon arriving at the job site, it became apparent that this was no ordinary flange flatness measurement job. After the explosion, the entire unit had been sent for overhaul and inspection, and both the bottom and top portions were split apart. The job entailed determining flatness for the top half of the flange, which was still connected to the structure and was located in an inverted orientation. Using the INCLINEO® High Precision Inclinometer system, LUDECA had thus far performed many field service jobs for flatness, straightness, and angularity, but all of these had been right-side-up or non-inverted applications. LUDECA’s field engineering began by inspecting the surface conditions, taking length and diameter measurements, and laying out a grid pattern. This was to be the first inverted job ever done with the INCLINEO, whose ability to measure angles, flatness, straightness, levelness, plumbness, and surface inclination would prove to be ideal for this application.
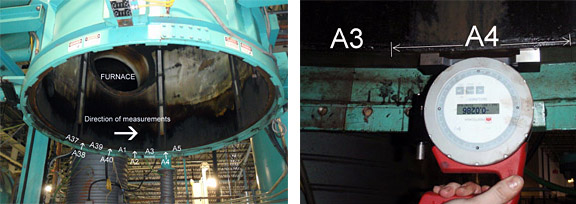
The flange was sectioned off into 40 segments, and labeled every 7.5″. With INCLINEO’s simple 3-button interface, wireless PC communication capabilities, and ALIGNMENT CENTER software on a laptop, readings were taken at each segmented point, and both 2-D and 3-D contour plots of the flange surface were generated. With the advancements in geometric measurement technologies, the Inclineo’s high accuracy resolution of 0.0003°/inch determined that the flange was, in fact, out of tolerance from the expected maximum peak-to-peak value of 0.040″ to a measured value of 0.131″.
by David Atehortua


