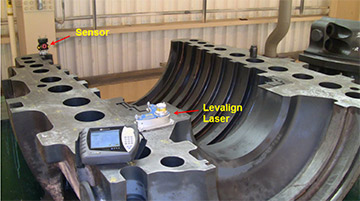
Recently, a flatness measurement was needed on two halves of an HP turbine shell using the LEVALIGN® system. The top half (resting upside down) was a typical quick and easy measurement, as shown below in Figure 1:
The second half was not so typical. The studs had to remain in the shell and the customer wondered if our tool could still take the measurement with the line-of-sight obstructions for the laser from the studs. The answer was YES!
The unique “InfiniSplice” feature of the LEVALIGN allowed for this to happen without having to resort to custom brackets to shoot over the top of the studs. InfiniSplice allows for multiple sets of measurements to be combined into one unified measurement. This is based on the concept that two sets of measurements can be unified or merged if they have three or more points measured in common.
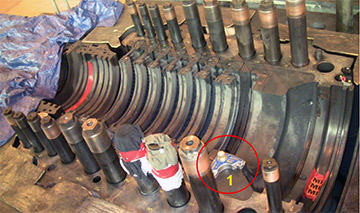
It’s simple. Just measure as many points as you can with the LEVALIGN laser emitter in the first position. See Figure 2.
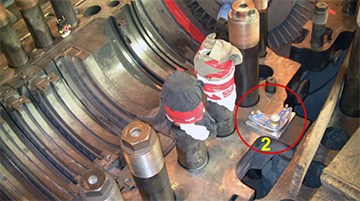
Then move the laser to another position and measure any points you couldn’t measure with the first measurement setup plus at least three points that you did measure with the previous setup. See Figure 3.
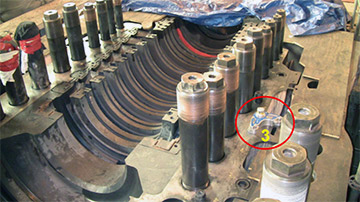
Now move the laser yet again, and repeat measuring the remainder of the points plus three points from either the first or second measurement. See the third setup in Figure 4. This process can be repeated as many times as needed, hence the term “InfiniSplice”.
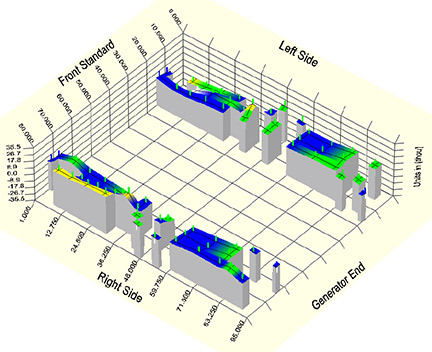
Just open all three (or more) files in the ALIGNMENT CENTER software and they are then instantly combined into one unified measurement. No need to select the splice points, the software knows which ones to use. If you can open three files, you can instantly splice them. It’s just that simple.
Figure 5 shows the combined flatness profile of the lower half of the turbine casing, taken in spite of the obstructions presented by all the studs.
Filed under:
Articles and Case Studies, Geometric Measurement by Daus Studenberg CRL
