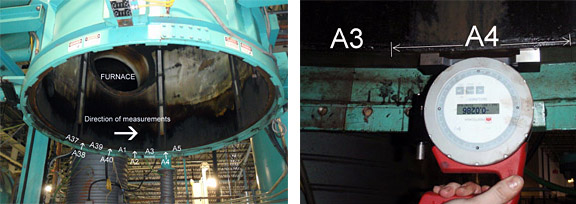
In December 2009, an aerospace industry service company in Florida was presented with an unusual challenge. A furnace that had exploded was believed to have suffered severe deformities at the mating flange surface. They were now faced with the task of determining whether or not the furnace flange was flat. LUDECA was contacted for assistance in determining whether or not the flange surface was still within allowable tolerances prior to the unit being rebuilt. Upon arriving at the job site, it became apparent that this was no ordinary flange flatness measurement job. After the explosion, the entire unit had been sent for overhaul and inspection, and both the bottom and top portions were split apart. The job entailed determining flatness for the top half of the flange, which was still connected to the structure and was located in an inverted orientation. Using the INCLINEO® High Precision Inclinometer system, LUDECA had thus far performed many field service jobs for flatness, straightness, and angularity, but all of these had been right-side-up or non-inverted applications. LUDECA’s field engineering began by inspecting the surface conditions, taking length and diameter measurements, and laying out a grid pattern. This was to be the first inverted job ever done with the INCLINEO, whose ability to measure angles, flatness, straightness, levelness, plumbness, and surface inclination would prove to be ideal for this application.

The flange was sectioned off into 40 segments, and labeled every 7.5″. With INCLINEO’s simple 3-button interface, wireless PC communication capabilities, and ALIGNMENT CENTER software on a laptop, readings were taken at each segmented point, and both 2-D and 3-D contour plots of the flange surface were generated. With the advancements in geometric measurement technologies, the Inclineo’s high accuracy resolution of 0.0003°/inch determined that the flange was, in fact, out of tolerance from the expected maximum peak-to-peak value of 0.040″ to a measured value of 0.131″.
Filed under:
Articles and Case Studies, Geometric Measurement by David Atehortua
