
In today’s market, many shops are advertising vertical turbine pump repair—but very few actually have the capabilities to do it correctly. The unfortunate reality is that many of these shops are just parts changers. They’ll press out worn bushings, push in bushings, cut new wear ring fits, replace shafts, and call it a “repair.”
The problem is that this approach completely misses the bigger picture. Most vertical turbine pumps don’t fail simply because a part wore out. They fail because of underlying issues in alignment, machining, and critical dimensional checks that go unaddressed.
To properly repair a vertical turbine pump, a shop must first have the capabilities—the right machines, the right measurement tools, and the right handling equipment. This includes:
- Precision machine work on heads, column piping, and bowl assemblies.
- Concentricity checks from the motor fit on the pump head all the way down to the suction bearing.
- Parallelism verification across critical components to ensure shafts, bearings, and columns are properly aligned.
- Dynamic balancing capacity to make sure rotating assemblies are balanced as a whole, not just in parts.
- Overhead crane capacity under roof to safely handle, assemble, and disassemble large pumps for inspection and repair.
If you’re not verifying concentricity, parallelism, and balance of the rotating assembly—and if you don’t even have the ability to lift, assemble, and test these massive pumps under one roof—you’re not doing vertical turbine pump repair correctly.
Here’s the truth: most shops don’t even own the VTL lathes, the balancing equipment, or the overhead crane capacity needed for this work. Without these tools, they can’t properly machine large assemblies, disassemble for inspection, or reassemble for a complete teardown and test.
This is why many pumps “repaired” in these shops end up back in the field with the same problems—or worse—because the root causes were never addressed.
It’s crazy to see these so-called pump shops winning contracts for vertical turbine pump repair when they have zero capability to actually perform the work themselves. Everything they pull out of the pump has to be sent to a third party for machining, balancing, or even basic inspections. When a shop can’t handle the disassembly, inspections, machining, balancing of the rotating assembly, and reassembly under one roof, they aren’t truly repairing your pump—they’re just managing paperwork while someone else does the real work. This creates risk, delays, and cost for the end user.
For operators, municipalities, power plants, and industries depending on vertical turbine pumps, downtime is costly. A repair that only replaces parts without addressing fundamental alignment, balance, and handling requirements is not a repair at all—it’s a temporary patch.
At shops JetTech Mechanical LLC utilizes for our pump repairs, we utilize and recommend shops around doing this work the right way. With the machines, the balancing capacity, the cranes, and the skilled people in place, we don’t just change parts—we solve the problems that cause pump failure in the first place.
If you’re trusting a shop with your vertical turbine pumps, ask them:
- Do you have the equipment to check concentricity, parallelism, and balance across the entire pump assembly?
- Can you disassemble, inspect, and reassemble the pump under one roof?
- Do you have the crane and machining capacity to handle large vertical turbines?
- Can you balance the rotating assembly as well?
- Or are you just replacing parts?
Because at the end of the day, not all pump repair shops are created equal.
Thank you Brian Franks with JetTech Mechanical LLC for sharing this informative article with us!
Laser Alignment for a Vertical Water Pump with Easy-Laser XT
by Diana Pereda

When you’re choosing precision tools such as laser shaft alignment systems, the warranty matters. A good warranty is a sign of quality and reliability. Ludeca’s laser premier laser shaft alignment product line, Easy-Laser, carries a warranty that reflects our service excellence commitment to our customers, rooted in our long history of helping our customer achieve success and focus on building lasting relationships.
Here’s how we stand out:
We’ve been in the business of laser shaft alignment since the early 1980s, earning our reputation as a trusted name in the industry. For over 40 years, we’ve helped customers solve alignment challenges with tools they can depend on. Our goal isn’t just to make the first sale—it’s to create a true “lifetime” customer. That philosophy drives us to carry reliable products and back them with a warranty you can count on.
We believe a warranty should be easy to understand, not a puzzle to solve. That’s why we list our terms and conditions clearly and make them accessible to everyone. You can find the full details on our website. No fine print, no hidden catches—just straightforward information about what we cover and how we support you.
- Three-Year Coverage: We provide a three-year warranty that protects against defects in materials and workmanship under normal use.
- Defined Terms: We specify what “normal use” means—using the tool as intended—and what “misuse” looks like, such as extreme conditions, abuse or unauthorized changes.
- No Extra Hurdles: You won’t find requirements like onerous mandatory calibrations or particular maintenance routines with hidden traps threatening to void your warranty if you fail to keep up with their requirements. (Of course, it is important to make sure your calibrations are up to date, we just won’t void your warranty if you don’t!)
When it comes to warranty claims, we take a customer-first approach. Our focus isn’t on dodging responsibility—it’s on solving your problem quickly and keeping your trust. Whether it’s a manufacturing defect or an unexpected failure, we work with you to get it resolved quickly. We even offer free loaner systems or components to keep you in business while we fix your tool. That’s how we turn customers into partners.
Beware of warranties that come with vague promises or tricky conditions. For example, a “lifetime” warranty might only mean the tool’s expected lifespan (very short), not the lifetime of your ownership of the tool. Or, an “unconditional” coverage might actually be loaded with conditions, such as excluding common wear and tear. Our warranty terms are clear and designed to support you and deliver real value, not confusion and disappointment.
With Ludeca and Easy-Laser, you’re getting more than just a laser alignment tool—you’re getting the company that stands behind it. You’re getting peace of mind. Our warranty is a promise backed by decades of experience and a commitment to your success. We’ve been aligning the world since the 1980s, and we’re here to support you for the long haul.
by Diana Pereda

Precision Maintenance is a proactive approach to maintenance that focuses on ensuring equipment and machinery are installed, maintained, and operated with the highest level of accuracy and precision. The goal of precision maintenance is to optimize the performance of assets by reducing wear and tear, eliminating sources of inefficiency and vibration, and extending the lifespan of equipment. By adhering to strict maintenance standards, it prevents issues before they arise and enhances reliability, reducing the likelihood of unplanned downtime.
Principles of Precision Maintenance
At its core, precision maintenance emphasizes:
- Accurate Installation: Equipment must be installed correctly, with precise alignment, tensioning, and balance.
- Minimized Variability: Every action taken during maintenance should reduce variability in performance, leading to consistent and reliable operation.
- Optimization of Machine Life: Maintenance activities focus on extending the lifespan of equipment by preventing damage due to poor practices.
- Systematic Approach: All maintenance tasks are carried out in a repeatable, measurable way using data and standards.
- Predictability: By eliminating variability, equipment performance becomes predictable, which helps in forecasting failures and optimizing work schedules.

Best Practices for Precision Maintenance
- Precision Alignment
- Importance: Misalignment is one of the leading causes of equipment failure, resulting in increased vibration, increased energy consumption, and premature wear.
- Best Practices: Use laser alignment tools to ensure shaft and coupling alignment is accurate to within tight tolerances. Avoid using “eyeball” or “rough” alignment methods that lead to misalignment and machine inefficiency.
- Precision Balancing
- Importance: Unbalanced rotating equipment can cause excessive vibration, leading to damage to bearings, seals, and other components.
- Best Practices: Ensure all rotating equipment, such as pumps, fans, and motors, are balanced to the manufacturer’s specifications. Use dynamic balancing techniques to correct imbalances.
- Torque Management
- Importance: Applying the correct torque to bolts, nuts, and fasteners is critical in preventing loosening and failure under operational loads.
- Best Practices: Use calibrated torque wrenches and screwdrivers to apply the proper torque values as specified by manufacturers. Never rely on “feel” or over-torquing, which can damage equipment or lead to joint failures.
- Precision Lubrication Management
- Importance: Improper lubrication, whether too little or too much, leads to premature bearing failures and increased wear on moving parts.
- Best Practices: Allow your Ultrasound tools and baselines to establish your lubrication intervals and amounts. Use precision tools such as ultrasonic grease gun meters to apply the right quantity and ensure the correct lubricant type is used for each machine.
- Precision in Bearing Installation
- Importance: Improper bearing installation can lead to excessive wear, increased friction, and early failure.
- Best Practices: Ensure that bearings are installed using correct procedures and specialized tools such as bearing heaters and bearing installation kits. Avoid hammering or forcing bearings into place, as this can cause misalignment or damage to the bearing.
- Root Cause Analysis (RCA)
- Importance: When failures occur, RCA helps identify the underlying causes rather than just addressing the symptoms.
- Best Practices: After any equipment failure, conduct a thorough RCA to determine what went wrong and how it can be prevented in the future. This allows for continuous improvement in maintenance practices.
- Clear Work Instructions and Standardization
- Importance: Inconsistent maintenance practices can lead to variability in performance and increase the risk of human error.
- Best Practices: Develop clear, standardized work instructions for maintenance tasks. Ensure that all technicians are properly trained and follow these standards rigorously.
- Measurement and Calibration of Tools
- Importance: Accurate maintenance relies on the precision of tools and instruments used for tasks such as alignment, vibration analysis, and torque application.
- Best Practices: Regularly calibrate all precision tools and measuring instruments. Calibration ensures that the tools maintain their accuracy and produce reliable results.
- Double Checking Work Using PdM Tools
- Importance: Vibration and heat generation are key indicators of equipment condition and can provide early warnings of imbalance, misalignment, looseness, or bearing wear.
- Best Practices: Incorporate the use of vibration pens and infrared thermography to double check the work of alignment, balancing, torquing, etc. The goal is to minimize vibration levels and investigate abnormal patterns immediately to prevent equipment failure, catching as early as possible for correction.
Benefits of Precision Maintenance
- Reduced Downtime: Equipment lasts longer and operates more reliably, reducing unplanned downtime and increasing overall productivity.
- Improved Equipment Efficiency: With precise maintenance practices, equipment runs more efficiently, consuming less energy and reducing operational costs.
- Extended Asset Lifespan: Precision maintenance eliminates common causes of premature failure, extending the lifespan of critical assets.
- Fewer Failures and Repairs: By addressing the root causes of failure and maintaining equipment with high precision, organizations experience fewer catastrophic failures.
- Increased Safety: Properly maintained equipment operates within safe parameters, reducing the risk of accidents caused by failures.
Conclusion
Precision maintenance focuses on accuracy, consistency, and quality in every maintenance task, from installation to repairs. By implementing precision maintenance best practices, organizations can reduce equipment failures, lower maintenance costs, and improve overall reliability. Precision is key to achieving operational excellence and ensuring long-term asset performance.
Thank you Joe Anderson with ReliabilityX for sharing this educational blog with us!
Visit our Knowledge Center for resources and tools to help you succeed when implementing and using our maintenance technologies! Explore our helpful information to reduce equipment failures and downtime.
by Diana Pereda

Reliability is a culture propagating throughout the industry. When successful, a Reliability Program is proven to decrease safety risks, diminish unscheduled downtime, increase efficiency, improve production, and reduce costs. The key here is saving money and reducing risk. There are few competitive advantages between rival businesses in a global economy and a world full of information. This is where this cultural change can make a difference. If a company can increase production or reduce the amount of scrap (waste or rejects) by a small percentage, it could mean the difference between closing the doors or keeping the business profitably open. A successful reliability program can get you there. Here at LUDECA, we believe in this concept of reliability, and how modern shaft alignment and condition monitoring technologies and practices can fit into this culture.
- Roles in reliability: Often the responsibility for reliability in the plant falls on the shoulders of the reliability engineer. Although he or she was hired to oversee reliability, they are usually the leader in the effort of taking the company into the proactive maintenance environment. For a reliability program to succeed, it takes the concerted effort of all its employees to achieve the goal. Let us look at how different departments can affect the reliability of your plant.
- Maintenance: This is the department that keeps the plant running. Maintenance technicians are the eyes and ears of the plant. They know the equipment, its behavior, and its habits. They are familiar with the daily issues throughout the facility. When trained properly and given written and detailed procedures, they can be the team that keeps the reliability program afloat. Maintenance should be listened to, incentivized to report problems, and suggest improvements, be involved in planning and setting goals. This will ensure buy-in and give the reliability effort a meaningful chance of success.
- Production, Sales, and Marketing: Equally important is involving the Production and Sales teams. These departments can hinder a successful reliability program, especially if their priorities do not mesh with reliability priorities. These are the departments bringing in the revenue. It is very difficult to opt to stop production to perform an “unnecessary” preventative maintenance task. If the sales department is selling every widget that the factory can make, then pausing production would mean losing money short term to lower costs long term. When these teams are on board with the reliability program, and understand its long-term goals and constraints, they can work within that framework to maximize production to the entire company’s strategic benefit.
- Engineering: Engineering is the brain of the plant. Typically, this department owns the biggest percentage of the reliability effort. If engineering designs a flaw in the system, no amount of maintenance can fix that problem. The reliability and maintainability of a system needs to be designed into it from the get-go.
- Operations: Operations is the heart of the plant. This is the team that keeps things flowing. Operators play an integral role in plant reliability. They can detect changes in processes as they occur, which can be early indicators of potential failures. However, operating the equipment outside of its designed context, or performing the wrong start-up procedures could be a cause of premature failures.
- Management: Management is a key player in the implementation of a reliability program. They will be the ones allocating the money and resources towards the development and sustenance of a good program. They must thoroughly understand how Operations, Production, Maintenance, Stores MRO, Planning & Scheduling, all mesh, and work together so that their management decisions foster an environment where these departments work with each other and not against each other.
The plant is a network of complex systems with numerous assets in each system. The responsibility of making a cultural change and improving uptime should not fall on one individual. With the input of all departments and the successful fulfillment of each of these roles, a reliability program has a much higher chance of succeeding.
by Adam Stredel CRL
In the last few decades, we have heard many companies perform “PMs” (Preventive Maintenance tasks) on their assets or buy tools to help perform “PdM” (Predictive Maintenance), often hoping to solve all their problems without a real strategy in place. This can be a costly mistake as it risks inducing functional failures in your assets during their infant mortality period as a result of performing unnecessary intrusive work. There are many different maintenance strategies, which are essential for ensuring the reliability and availability of equipment and assets. However, companies should not just arbitrarily choose one for their maintenance department to follow. Instead, the maintenance strategy should fit what is best for a given asset. The most common strategies are Preventive, Predictive, and Run-to-Failure, although it may initially sound strange. Now, let’s take a look at how they differ.
Maintenance Strategies:
1. Preventive
A Preventive maintenance strategy is based on performing a maintenance task at periodic intervals. One example of such a strategy is greasing a bearing quarterly, regardless of whether that bearing actually needs greasing at that time. This is a good strategy to use when failures are expected to occur after a certain amount of time or number of hours of operation. We typically use a Preventive maintenance strategy with our vehicles. When we change the engine oil in our car, we typically do so every three to six months or every 3,000 to 10,000 miles. Whatever the chosen interval is, it is based on time or usage. Alternatively, we could periodically take an oil sample and send it to a lab for analysis to get the condition of the oil and trend that condition. This would more accurately tell us when we will need to change the oil. However, this strategy doesn’t make sense because it is not cost-effective. Changing the oil in the car can cost around $50 to $80. Performing an oil analysis just once would cost much more than that. Therefore, it is easier and more cost-effective to get the oil changed periodically to prevent engine failure. It is important to perform a cost analysis for each maintenance task, to determine if it makes more sense to use a preventive or predictive maintenance strategy.
2. Predictive
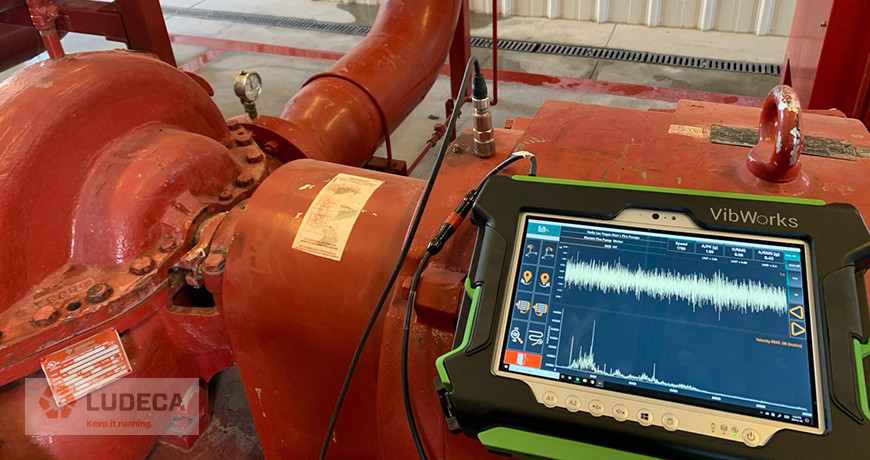
A Predictive maintenance strategy is typically used on critical equipment. It is based on Condition Monitoring. Condition Monitoring is a periodic check of the condition of a particular component or asset. Technologies used for Condition Monitoring are Vibration Analysis, Ultrasound Testing, Infrared Inspection, and Oil Analysis. For critical assets, it may not be cost-effective to shut the equipment down for days to do periodic bearing replacements. However, it does make sense to check the condition of the bearing (and trend it over time), so that maintenance can be planned for and executed well before a failure is predicted to occur, thereby minimizing the cost of repair and preventing any potential unplanned downtime or catastrophic failure of the equipment.
3. RTF (Run-To-Failure)
An “RTF” (Run-To-Failure) strategy, as the name implies, allows an asset to be operated until it fails. The asset is then replaced. Typically, this strategy should only be chosen when the criticality of the equipment is low, and the failed asset or component is quickly, easily, and cheaply replaceable. In these cases, applying a predictive or preventive maintenance strategy may be more costly or inefficient than simply letting the asset fail. Again, careful cost analysis that includes an accounting of all relevant factors such as labor cost, parts costs and downtime/lost production is key to determining successfully which maintenance strategy is best to use for each asset.
Choosing the right maintenance strategy for your equipment is crucial for minimizing downtime, increasing reliability, and maximizing the lifespan of your assets. Preventive, Predictive, and Run-to-Failure strategies each have their benefits and drawbacks, and the decision to use one over the other should be based on careful cost analysis and consideration of the criticality of the equipment. Doing so has shown that it can help drive a reliability program to success.
Watch our Reliability Matters: The Basics video for an overview of basic concepts to improve rotating equipment reliability and machinery health.
Machine Life Expectancy – What Should the Maintenance Organization Focus on?
by Adam Stredel CRL

Functional failures in plant equipment are unavoidable. However, the way a company handles its asset failures can have an impact on the bottom line of the annual maintenance budget. For instance, this can mean that the maintenance department reacts to fix an issue after it occurs, or has Proactive Maintenance technology and processes (PMs) in place to reduce the number of surprise failures. There are higher costs associated with both, but the difference lies in how long we hold these higher costs. Let’s take a look.
Reactive Culture
Reactive maintenance, as the name suggests, means fixing something when it breaks. When a company remains in a reactive maintenance state, they can quickly get into a downward spiral of bad situations. Maintenance costs can pile up on top of one another. For example, purchasing will continuously be expediting parts that are not in inventory for repairs and overhauls. To avoid this, some companies will keep a bigger stock of spare parts (driving up inventory costs and cost of storage.) Millwrights will have to work longer shifts to be able to “put out the fires”, meaning overtime pay for staff, while still having to perform their daily routine tasks. Working long hours and routinely performing unplanned work can cause undue stress, leading mechanics and millwrights to lose focus and potentially leading to overlooked safety hazards. In a reactive environment, unplanned downtime is king. This greatly increases costs, increases lost production, and fosters collateral damage in the rest of the system through catastrophic failures.
Proactive Culture
Proactive Maintenance means doing everything possible to prevent failures before they occur. Running a plant in the proactive domain is proven to lower costs, reduce safety risks, and run systems more efficiently. Given the initial capital outlay required to obtain the additional maintenance tools and technologies, training, and determining equipment condition baselines through condition and production monitoring, proactive maintenance typically results in greatly increased short-term maintenance costs. However, this increase is short-lived and the savings and benefits of increased production, greater efficiency and reliability will, over time, return many times the initial cost increase. The costs of reactive maintenance decrease as failures are prevented and preventative maintenance tasks are in turn replaced by intelligent condition monitoring. The net effect is a significant reduction in very expensive unplanned downtime, a decrease in spares consumption, inventory, labor costs and overall maintenance overhead. For example, performing precision laser shaft alignment is a proactive maintenance task.
One way to maintain a proactive culture within your maintenance department is to assign trained personnel to planning and scheduling. Too often, this falls under the responsibility of one individual, but it should be split into two separate roles (depending on the size of the plant.) I have visited numerous sites throughout the United States, and not one has lacked maintenance tasks for its millwrights. This is a key indicator that these two positions are needed.
Planning and Scheduling
Planning is a key component of a good reliability program. It generates more time for the technician because it increases the efficiency of each task through good job plans and properly written procedures. Proper planning also involves coordination with the MRO Stores department to ensure that a kit of the appropriate tools and parts for the planned job is available and timely delivered to the job site. This avoids noncompletion of assigned tasks due to wrong or missing parts and tools.
Scheduling involves detailed coordination with the Operations, Production, MRO Stores and Maintenance departments to ensure that the timeline of a scheduled task meshes perfectly with each of these departments’ needs and constraints. This in turn assures that the scheduled task occurs smoothly, within the scheduled timeframe and with the planned and allocated resources, both physical and human. This is a key component of efficient reliability and accountability and ultimately boosts profits.
Top 5 Maintenance Tips to cut costs without sacrificing quality and productivity
by Adam Stredel CRL
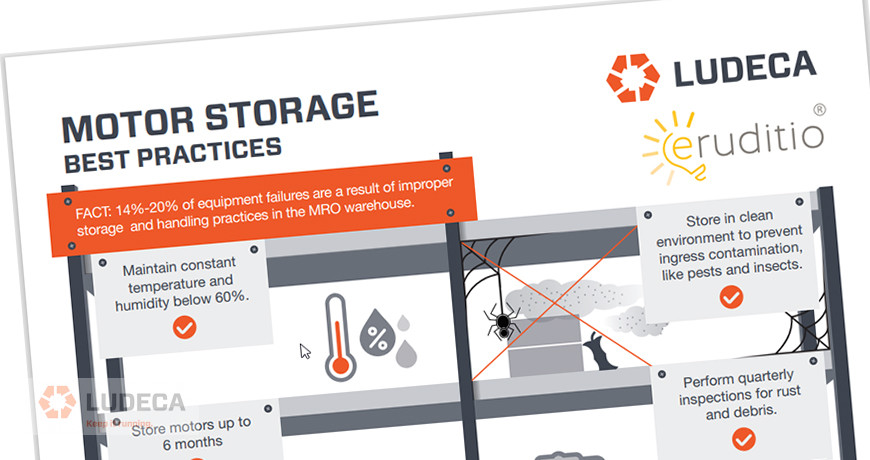
FACT: 14%-20% of equipment failures are a result of improper storage and handling practices in the MRO warehouse.
A few simple practices could help to prevent damage to electric motors:
- Maintain constant temperature and humidity below 60%.
- Store in a clean environment to prevent ingress contamination, like pests and insects.
- Store motors for up to 6 months.
- Perform quarterly inspections for rust and debris.
- Ensure proper use of anti-corrosion coatings.
- Inspect and maintain grease and lubrication levels.
- Turn rotor 1-1/4 turn every 3-6 months, always in the same direction.
- Store motors in a vibration-free environment or isolate them.
- Remove coupling off the shaft.
Visit our Knowledge Center and download our MOTOR STORAGE BEST PRACTICES Infographic. Perfect to print and hang in your storeroom!
Thank you to Eruditio LLC for their help with this blog/Infographic!
by Ana Maria Delgado, CRL
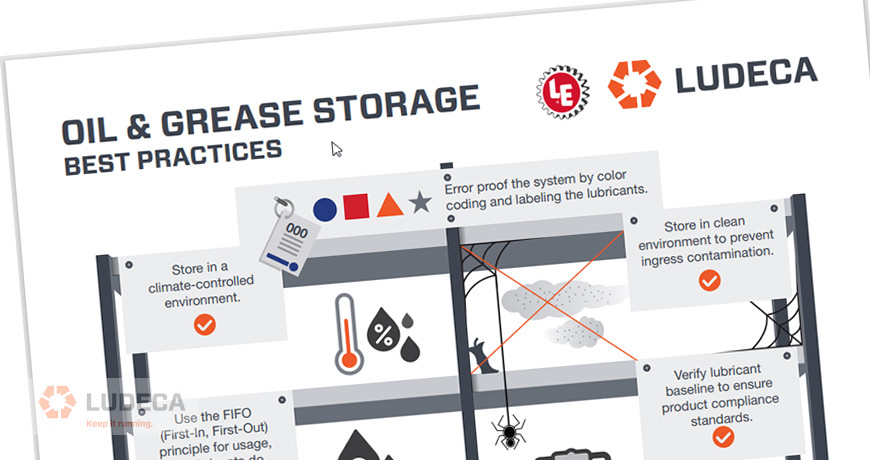
A few simple practices could help to prevent damage and contamination of your oil and grease:
- Error-proof the system by color coding and labeling the lubricants.
- Store in a climate-controlled environment.
- Store in a clean environment to prevent ingress contamination.
- Use the FIFO (First-In, First-Out) principle for usage, as lubricants do have a shelf life.
- Verify lubricant baseline to ensure product compliance standards.
- Do not use open-top containers. Use only sealed containers for storage and transportation.
- If storing in drums, ideally store in the horizontal position on racks.
- If storing drums upright, bungs must always be kept tight and drum covers should be used.
- Always filter new oil.
Visit our Knowledge Center and download our OIL & GREASE STORAGE BEST PRACTICES Infographic. Perfect to print and hang in your storeroom!
Thank you to Lubrication Engineers for their help with this blog/Infographic!
by Ana Maria Delgado, CRL

A few simple practices could help to prevent damage to your spare bearings:
- Label bearings by type, size, bearing number, and date stored.
- Label shelves in accordance with in-house MRO guidelines.
- Maintain constant temperature and relative humidity.
- Store in a clean environment to prevent ingress contamination.
- Use oldest bearings first (FIFO).
- Use sealed bearings within 5 years of manufacture date.
- Keep bearings in their protective packages until ready to use.
- If removed from factory packaging, cover with a clean lint-free rag.
- Lay them on a flat surface (possible deformation if hung or standing on the side). Flip periodically.
- If the bearing is dropped, do not put it back on the shelf (do not use it!)
- Store bearings in a vibration-free environment.
Visit our Knowledge Center and download our BEARING STORAGE BEST PRACTICES Infographic. Perfect to print and hang in your storeroom!
Has your Equipment Been Condemned to Death? Bearing Storage Part 2 of 2
by Ana Maria Delgado, CRL
Precision Maintenance is one of the 15 foundational processes that is a must if you want to develop a complete maintenance system. Precision maintenance is the tasks that take place typically at commissioning or recommissioning to extend the life of an asset. Commissioning takes place at the initial startup of a newly installed asset or assets. Recommissioning is starting up an asset after it has been replaced or even worked on. The benefits of having a good series of Precision Maintenance Programs are a key to asset life extension, reduced energy consumption, reduced maintenance spend, and reduced unplanned downtime. Below are a few of the programs that should exist under the Precision Maintenance Process:
- Laser Alignment Program
- Balancing Program
- V-belt/Sheave Alignment Program
- Bearing Installation Program
- Torquing and Fasteners Program
- Defined Measurements Program
So, this begs the question, what is a program? A program is simply a plan of action to accomplish a specific end. In each one of the programs listed above, there should be a plan of action to accomplish the specific end of asset life extension and all the benefits that comes with it.
Developing Your Program
Things that should be included in your program are:
- Acquisition of the tools
- Training on those tools
- Procedures around the use and application of the tools
- A decision tree mapping what assets will these tools be applied
- A place to store your data file (hopefully, tied to your assets in the CMMS)
Download alignment and balancing procedures from LUDECA Knowledge Center.
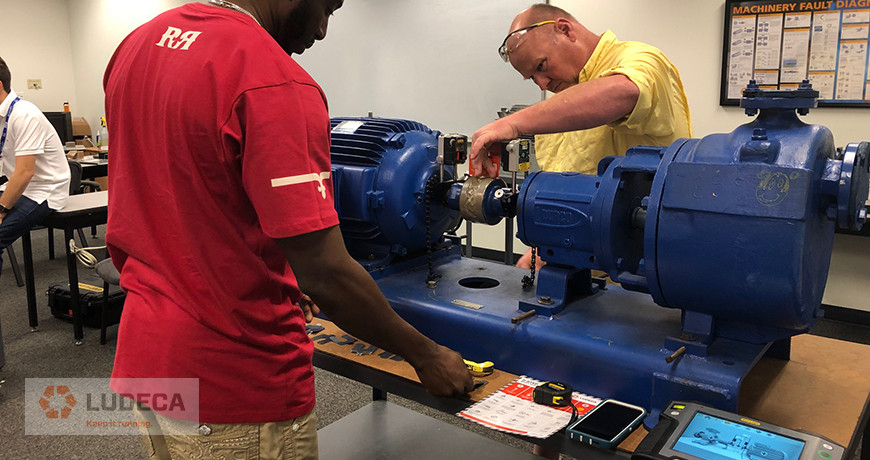
Some basics tools needed for best-in-class precision maintenance would be laser alignment tools, balancing tools, bearing installation kits, bearing heaters, torque wrench, and torque screwdrivers, a pocket guide on torque specifications, V-belt laser alignment tools, calipers, chain wear gauges, etc. Training, standards, and procedures around doing work with precision should also complement these tools. A culture of precision work and asset life extension is the primary goal of the maintenance system. Your criticality analysis should drive what assets you decide to use precision maintenance on. In the end, if you take the time to set up this process properly and execute it, you will drive defects out of your system that would have led to premature failures. This is key to getting you out of the vicious cycle of reactive maintenance and leading you to a life of reliability.
Thanks, Joe Anderson with ReliabilityX for sharing your knowledge with us!
by Ana Maria Delgado, CRL
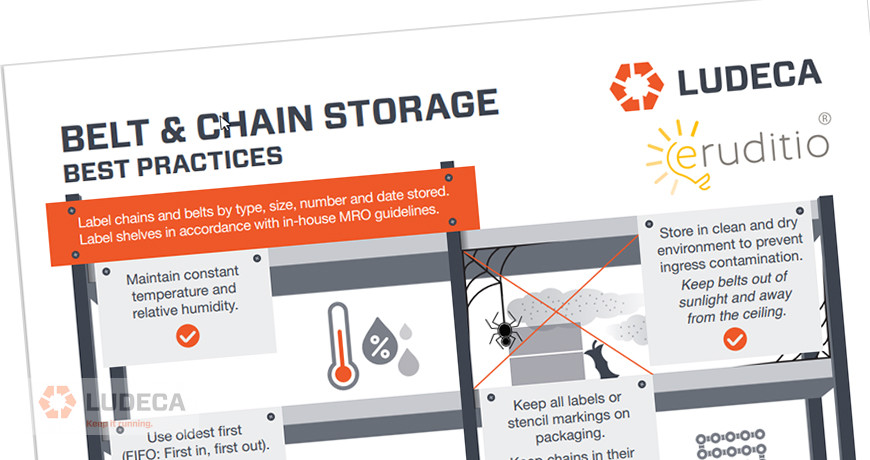
A few simple practices could help to prevent damage to your spare belts and chains:
- Label chains and belts by type, size, number, and date stored. Label shelves in accordance with in-house MRO guidelines.
- Maintain constant temperature and relative humidity. Store in a clean and dry environment to prevent ingress contamination. Keep belts out of sunlight and away from the ceiling.
- Use oldest first (FIFO: First in, first out). For Belts: Validate date of manufacture is within the past 2 years. For Chains: Date of purchase should be added.
- Keep all labels or stencil markings on the packaging. Keep chains in their protective wrappers and packaging until ready to use.
- Tag belts with a “dispose-by” sticker. Set for 5 years after the manufacturing date. Dispose of expired belts annually.
- If not packaged, lubricate chains frequently to prevent corrosion.
- Lay chains and belts on a flat surface (possible damage if hung). Flip periodically. Belts can be hung on a foam-noodle wrapped peg with the same radius as the sheave.
- If not packaged, DO NOT stack.
- Store chains in a vibration-free environment.
Visit our Knowledge Center and download our BELT & CHAIN STORAGE BEST PRACTICES Infographic. Perfect to print and hang in your storeroom!
Thank you to Eruditio LLC for their help with this blog/Infographic!
7 Belt Storage Tips for Better Equipment Performance and Long-Lasting Belt Life
by Ana Maria Delgado, CRL
I recently spoke to a reliability engineer who was rolling out our alignment and vibration equipment to fifteen plants across the U.S. He involved us early on in the process. His company didn’t just set aside budget money for the equipment purchase, but also enough to properly train their field service personnel in how to properly use and benefit from the new technologies. We addressed not only the use of the alignment tools but also proper equipment installation, lubrication, soft foot, pipe strain, thermal growth, etc.
One of the key topics of discussion was alignment tolerances. Since this customer has high-speed ammonia compressors, this was a key concern for good alignment and they, therefore, adopted the new ANSI/ASA Standards alignment tolerances as their corporate standard. Since these tolerances are built into our laser alignment system, it was not only easy for the user to determine if the measured alignment met their established corporate alignment standards, but also for management to review the work to ensure it was correctly completed. This oversight is easily accomplished via signed PDF documentation that allows storage of the “as found” and “as left” alignment results with the work order, and also allows for easy report generation in the field for review.
I was told that their vibration analysis program still identified equipment that was out of the established alignment tolerances. How could this happen? It turned out that contractors were performing work without being held to the same standards as plant personnel, including meeting the prescribed alignment tolerances or using specific alignment equipment to perform the work. In addition, the contractor was not required to provide a copy of the results for review and digital storage.
How could this happen? Unfortunately, it is not so uncommon. Many facilities or corporations do not require that maintenance activities be performed to standards or with the equipment they can trust for the results. Additionally, they do not clearly write job plans that are issued to internal maintenance employees or contractors that specify how the acceptable results are to be achieved (what steps are required, what tools are required, what standards should be met, and what documentation of results is required.) In addition, the Maintenance Planner does not review the results of the completed work to confirm that it was satisfactorily completed within acceptable specifications. Oversight failures, as well as specification failures in job plans and work orders, can easily result in continued reliability and maintenance issues and repeated or wasted efforts to keep your equipment running.
Fortunately, the answer is not too complicated. If the problem is that the contractor is not performing the job to company standards, then the job scope and specification need to be more clearly presented in the bidding process for a job. If the requirements are clearly stated and accepted by the contractor, then they must abide by those standards. Otherwise, the contractor may risk two things: having to come back on-site to fix the issue under warranty and losing you as a customer in the long run. Communication is the key here. Being open and upfront about the expectations can avoid a lot of headaches that will linger long after the contractor has completed the job. In the case of contractors that are “permanently in-house,” the answer is a bit more complicated. A good approach to solving this issue is to involve them in training efforts within the organization. This will get them better prepared for the tasks to be done at the site. If all else fails, have a third-party expert review the work to help understand why the work was not conducted or finished properly.
by Frank Seidenthal CRL
Maintenance planning, scheduling, and work execution are all critical for the success of best practice returns in maintenance and reliability. Unfortunately, it is easy to confuse and merge these processes together, thereby lowering the efficiency of maintenance activities and the overall health of manufacturing assets. The reality is that each of these efforts is dependent on each other, but separate and critical functions in a well-organized maintenance process.
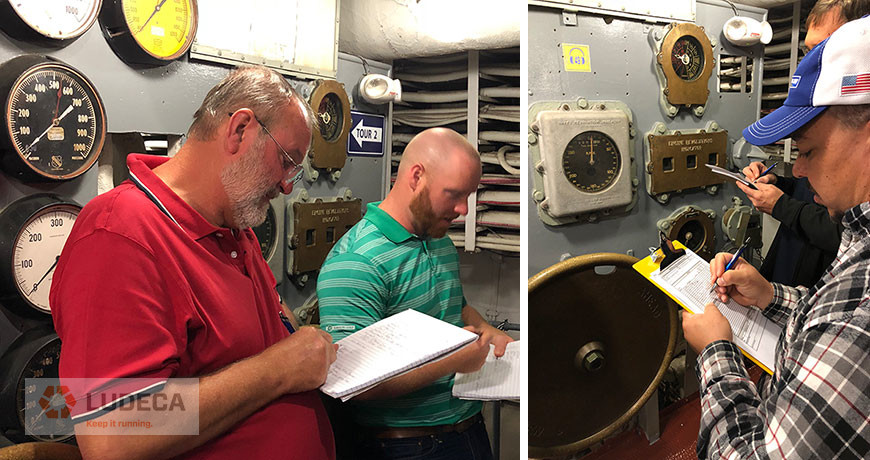
“We should always plan first, schedule those planned activities and finally ensure the work is properly executed on-time with precision”
The following are stages in creating a well-organized successful maintenance program:
- The first stage in the process is creating a “Work Order Request”. The requestor should always clearly specify “where”, “what”, “why” and “severity” of the work required and enter the work request as early as possible. Work order requests should always be reviewed, prioritized, and approved by management from both operations and maintenance. Doing this requires a valid criticality ranking of the equipment, consisting of specific maintenance, operational, and EHS considerations. This creates buy-in from everyone affected and ensures only necessary work approval and progression through the process.
- Once the work request is approved and prioritized, it becomes a “work order” entering the planning backlog and becomes the responsibility of the Maintenance Planner. The Maintenance Planner is a strategic role and should not be involved in daily maintenance work activities. The maintenance planning stage ensures accurate job/work instructions are created, labor skills and hours required are understood, parts availability is ensured or ordered (some parts may have a long lead-time), required support is identified (contract labor support, cranes, etc.) and safety permits identified. The planner should review existing work plans to see if one is already available for this task or create a new job plan if needed. The Maintenance Planner works with the MRO department and is notified when all required repair parts are available. These parts should be kitted, in a controlled area, so everyone knows they are available to complete the work when the time comes. Once the planner has assured these things are complete the work order and process moves to the next stage.
- Now the work can progress to the “schedule ready” phase and the Maintenance Scheduler takes over. At this stage, everything is in place to get the work done. Functional repair steps are correctly written, safety concerns are identified, and permits issued as needed, parts staged, and available to do the work and common and special tools available. The Maintenance Scheduler works with the maintenance and operations management, and coordinates within workforce restraints (vacations, etc.) and places the work on a schedule to be completed. This schedule is reviewed and approved by all stakeholders and posted so everyone is aware of what they will be working on in the days ahead. At this point, every effort is taken not to break the work schedule and ensure it is completed as planned.
- The Maintenance Supervisor now takes over and assigns individuals to complete the work on the scheduled day/week. The Maintenance Supervisor is responsible for ensuring the daily workflow is followed, problems addressed, the work is correctly completed on-time as scheduled. This individual is working daily in the plant with the maintenance and operational groups.
- The maintenance workers should follow the work instructions and provide feedback with missing steps, parts, tools, safety concerns, and issues and actual time to complete the work assigned to them. This feedback is critical because it allows future work to be better planned, scheduled, and executed, thereby increasing efficiency, reducing unscheduled downtime, and saving cost.
- The Reliability Engineer should use all of this information to analyze and determine routine equipment failure patterns and potential ways to eliminate this work from being required in the future through “Reliability Improvement Projects” (RIE), etc.
Within your facility, you may encounter different job titles as described in this article. However, it is extremely important that the overall roles and processes be in place and routinely followed. Not doing so will lead to dysfunctional work processes and prevent your company from achieving best practice maintenance and reliability goals.
For further reading, we refer your attention to Alan Luedeking’s excellent blog: Reliability – A Holistic Effort.
Need a platform that is going to take your planners/schedulers to the next level? Contact our colleagues at Eruditio.
by Diana Pereda
In our previous post DOWNTIME: 8 FORMS OF WASTE, we have seen the eight forms of waste that downtime can produce. So what then are the benefits of greater uptime? This useful acronym spells it out:
Utilization – Better utilization of skills, resources and technology to improve asset reliability
Profit – From decreased productivity costs, MRO spares costs and energy required for production
Targeting – Measuring progress toward a goal to achieve zero waste, accidents and downtime
Integrity – Integrity of equipment through inspection, testing and preventative maintenance
Mean Time Between Failures – increased MTBF with commensurate increase in availability, reliability and performance efficiency
Elimination of Defects – reduce risk of catastrophic failure, environmental disasters and injury
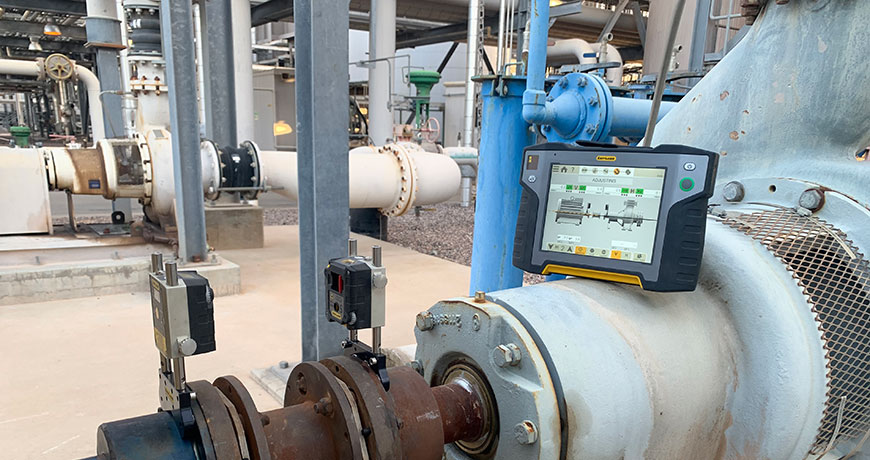
Thank you Brian Franks with JetTech Mechanical LLC for sharing such a great picture!
You can increase equipment reliability and improve uptime by implementing an Asset Condition Management program that includes defect elimination by applying precision lubrication, alignment, and balancing techniques complemented by condition monitoring technologies like ultrasound and vibration analysis to early detect possible failures allowing for better planning and scheduling of your maintenance activities.
Make sure you’re getting the most out of your tools. Contact LUDECA and let our team of Certified Reliability Leaders help you jump-start, improve or refine your Asset Condition Management program.
Source of inspiration: UPTIME ELEMENTS™ passports by Reliabilityweb.
by Diana Pereda
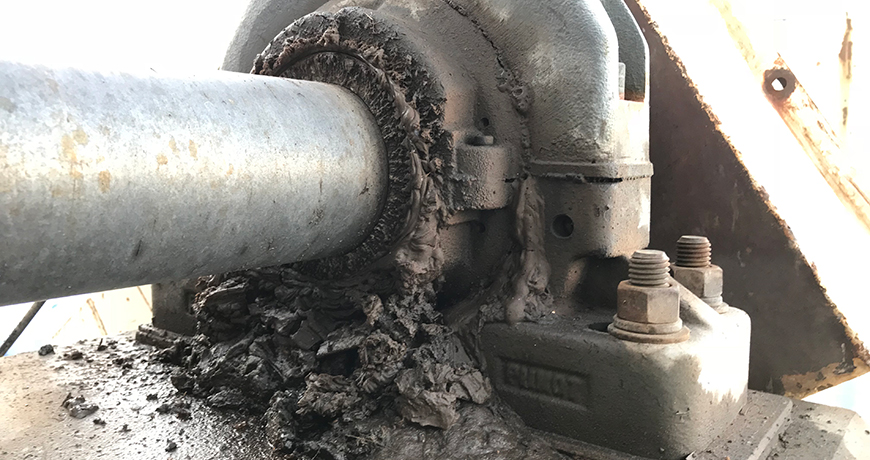
We know that unforeseen failures can leave machines unavailable for use. Defects attributed to premature component wear and failure due to over/under lubrication, poor installation practices such as improper bearing heating can also cause inventory depletion and other forms of waste…How else can we think about the costly effects of downtime? This useful acronym spells it out:
Defects – Out-of-spec products that require additional resources to fix.
Overproduction – Producing too much of a product before it is ready to be sold.
Waiting – Time waiting for next step in process.
Non-utilized staff talent – Workers that are not effectively engaged in the process.
Transportation – Unnecessary movements of materials.
Inventory – Idle inventory.
Motion – Unnecessary movements by people caused by inefficiencies in process.
Excess processing – Poor maintenance that causes more work than is necessary to produce a good product.
by Diana Pereda
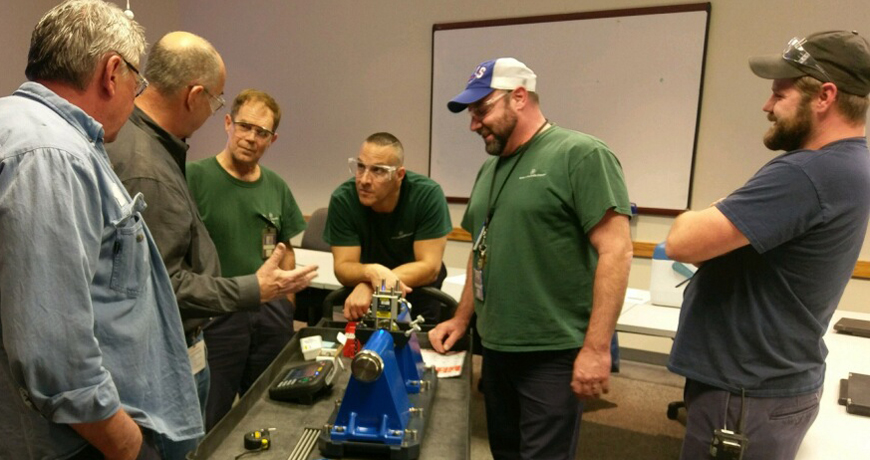
At the onset of any program we should be more interested in education than in training. Training involves learning how to perform a task, while education means understanding the why or importance of the task. While both are necessary for a successful program, education will yield a stronger, more involved team. Unfortunately, many companies focus too much on the initial “button pushing” aspects when introducing a new technology.
Education encourages workers to become more invested in the tasks and success of the reliability program. It can transform the group into game changers in the area of reliability and cause them to question what is currently occurring within the program, to recognize opportunities and strive to improve.
While education is vital, it comes with great responsibility. Leaders of reliability programs should expect their employees to return from a reliability course with a better idea of how condition monitoring can effectively increase equipment reliability and be willing to provide the required support to take full advantage of the education gained.
Is there a difference between education and training? You bet!
How quickly the reliability programs succeed is highly dependent on the initial foundations that are set for it.
Take your Alignment, Condition Monitoring and Ultrasound programs to the next level!
Let LUDECA field experienced instructors and Certified Reliability Leaders (CRL) coach and train you in the fundamentals and skills you need to utilize your tools to the fullest and implement the benefits of precision maintenance in your facility.
by Ana Maria Delgado, CRL
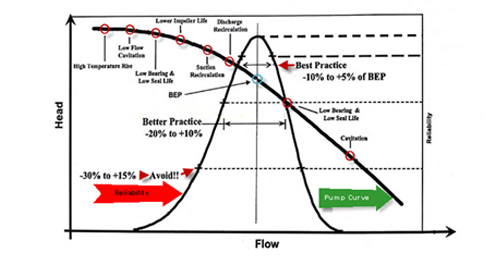
Centrifugal pumps have a specific design point at which they operate most efficiently. This sweet spot is known as the BEP (Best Efficiency Point) which provides the design engineer with the required flow and pressure while also providing the best efficiency. If the pump has been specified incorrectly or is placed into a system that doesn’t have the proper system head, the pump will become a reliability problem child. When a centrifugal pump is placed into a system without the required system resistance, the pump will run off its curve to the right, resulting in early bearing and mechanical seal failures and impeller damage caused by cavitations. If the pump is placed into a system with excessive system resistance, or, as frequently happens, the pump discharge valve is throttled early, bearing and seal failures occur along with impeller problems caused by discharge recirculation. Best practice dictates that the pump be specified and designed to operate within +5% to –10 % of its designed BEP. This will result in lower operating and maintenance costs and a happy pump.
by Yolanda Lopez
Reposted from People and Processes, written by Jeff Shiver CMRP, CPMM, CRL
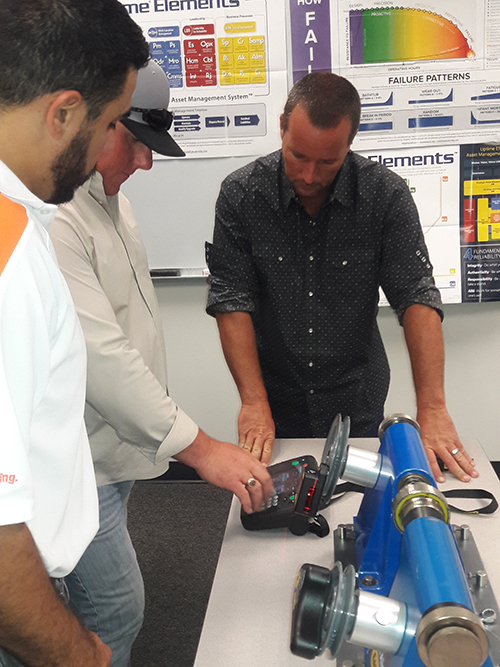
Do you find yourself wondering why your employees haven’t taken the initiative and approached you for additional training? Well, they must not want the extra training, right? Wrong! Sometimes, employees do want training, but they just don’t ask. Here’s why:
1. THEY HAVE FEAR OF REJECTION
People don’t like to be told no! The majority of employees don’t understand the organization’s vision, goals, brand promise, or key initiatives.
2. THEY FEEL UNSUPPORTED
Employees get worn out from a culture of mediocrity being tolerated, commitments not honored, and requests being ignored.
3. THEY DON’T KNOW HOW TO ASK
Operators, Mechanics, Planners, and even Managers may not understand how to equate the returns of training.
4. THEY DON’T KNOW WHEN TO ASK
Many employees don’t know when there is flexibility within the budget.
5. THEY ARE AFRAID OF BEING NEEDY
If no one else is asking for training, then why should they expect to be treated differently?
6. THEY FEEL AWKWARD OR UNCOMFORTABLE
There must be a commitment for development and the line of communication should be open.
7. THEY DON’T FEEL CHALLENGED
They may be topped out and let with nowhere to go from a promotional perspective.
8. THEY DON’T KNOW WHAT THEY DON’T KNOW
When people have never been exposed to anything else, they don’t know what else is possible.
Keep these things in mind the next time you offer training, or feel that your employees should ask you if they want it. A better approach may be discussing this with your employees individually.
Check out LUDECA training offering for alignment, geometric measurements, vibration analysis, balancing and ultrasound.
by Ana Maria Delgado, CRL
Guest Post by Ricky Smith, CRL, CMRP, CMRT
Pipe stress is caused by misalignment of the mating surfaces of two pipe flanges creating abnormal internal stress of pump bearings, seals, motor bearings, and couplings, and can possibly change the displacement of a pump.

General Rules which must be followed by maintenance personnel and contractors: (if you truly want to stop a long term pump problem)
- Pipe flanges attached to pumps must be aligned where the gap does not exceed the thickness of two gaskets or the tolerance established by your company’s engineering standards.
- Pipe flange bolts must drop in without assistance.
- Cable pullers, come-a-longs, or long bars should not be used when aligning a flange that is connected to a pump.
- Validate the elimination of pipe stress by following the guidelines listed below.
Failure Modes experienced from Pipe Stress on Bearings:
- Wear caused by seals leaking
- Wear caused by static vibration
- Indentations caused by overloading while static
- Corrosion caused by inadequate lubrication caused by abnormal loading (seal leaking)
- Flaking caused by misalignment and excessive loading
WARNING: Ensure your contractors follow the same process to eliminate pipe stress. Pipe stress elimination should be validated during the commissioning of a new pump.
Follow this process if you want to inspect your pumps that may have pipe stress:
- Align the two shafts between your pump and driver (typically an electric motor) to the tolerance recommended by the equipment vendor or your company’s engineering standards.
- Validate misalignment to insure motor and pump shafts are aligned to specification.
- Disconnect the outlet flange on the pump.
- Revalidate laser alignment of shafts.
- If alignment has moved then you have pipe stress. Do the same for the inlet flange.
- Make corrections as stated in the following procedures to eliminate pipe stress.
Elimination of Pipe Stress – “The Ricky Smith Method for Pipe Stress” as learned from Dan Turner (his maintenance and engineering manager at Exxon during his career in the 1970s)
- Bolt flanges to pump and insert blind flange gasket along with two regular flanges between pump and mating flanges (cover the hole between the welding area and inside the pump).
- Attached welding ground to flange. (do not attach ground lead to pump; welding group must always be attached to flange) WARNING: Failure to accomplish this one task properly will cause bearing failure by “electric arcing” which is a failure mode of bearings.
- Tack weld flange into place reverse welding each tack.
- Allow cooling for 10 minutes.
- Reverse stitch weld on opposite sides on the flange is similarly used for cast iron welding.
- After initial reverse stitch weld then weld normally using electrode recommended by the American Welding Society (typically E-6010 5P or GTAW)
- After root pass; weld in any direction you wish.
- Allow to cool and then disconnect flange, replace gaskets and;
Validate bolts will drop into holes without a pry bar.
Validate gap between flanges is no more than two gaskets thick.
To learn more about the effects of running equipment with pipe stress, watch the LUDECA Shaft Alignment Know-How Pipe Stress tutorial video.
by Yolanda Lopez
Reposted from People and Processes, written by Jeff Shiver CMRP, CPMM, CRL

The CMRT exam is the leading credentialing program by the Society for Maintenance & Reliability Professionals (SMRP) for the knowledge, skills, and abilities of maintenance and reliability technicians.
The CMRT exam tests competency and knowledge of specific tasks within 4 domains: Maintenance Practices, Preventative and Predictive Maintenance, Troubleshooting and Analysis, and Corrective Maintenance.
And that’s all well and good! But, why should you have your technicians certified? What are the benefits of having them pass the CMRT?
Here are 5 reasons why you should have your technicians certified:
- Validates the individual’s knowledge of maintenance and reliability best practices within the 4 domains.
- Confirms your commitment to advancing your team’s professional development.
- A globally recognized certification provides a personal level of satisfaction and pride in accomplishment.
- Encourages people to move beyond the status quo and achieve more for the organization.
- Determines strengths and opportunities by subject area to provide a development plan roadmap.
Get certified today! Click here to learn more about the CMRT certification.
Learn about People and Processes’ Maintenance and Reliability Technician Core Concepts Course
by Yolanda Lopez
