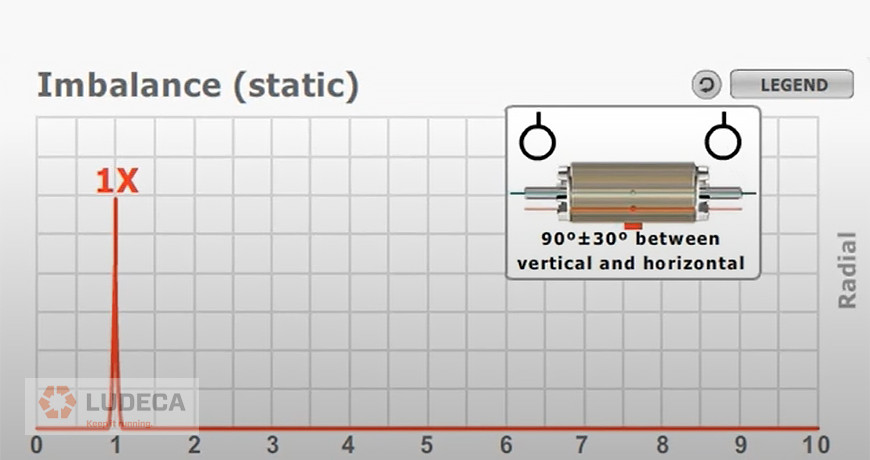
Caution: While unbalance always causes vibration at 1× RPM, 1× RPM vibration is not always caused by an unbalance. Other problems are:
- Misalignment: Misalignment can cause a 1× RPM component in the data, but it also generates a 2× RPM component and sometimes an elevated axial vibration at 1× RPM.
- Bent/Bowed Shaft: Generally, this fault will show signs of misalignment and unbalance and can change with temperature; if the data is steady then a dynamic balance can be attempted but once levels are somewhat reduced the misalignment due to the bend or bow becomes the dominant factor.
- Cracked Shaft: Data from proximity probes will generally show 1× RPM and 2× RPM. The phase would need to be monitored to help determine between an unbalance or a cracked shaft. If a balancing solution is not working as expected, then the user might want to evaluate for a cracked shaft.
- Eccentricity: An eccentric part can be balanced but that does not make it round, only balanced, so internal clearances can be constantly changing.
- Open Rotor Bars in Motors: When a motor has one or more broken rotor bars then the rotor bars adjacent to them must carry the load from the broken ones. Therefore, more heat is introduced, causing more expansion of the good rotor bars, in turn causing them to expand outward away from the centerline, thereby causing an unbalance.
- Partial Rubs: Rubs create a hot spot or area and can cause the shaft to bow, altering the mass centerline.
- Looseness: Parts that are not tight can move around, causing the mass center to be constantly changing.
- Belt Frequency Multiples: When the ratio is near an integer such as 3:1, 4:1, etc., then a multiple of the belt speed can be very close to the shaft rotational speed. Using a 1× RPM tachometer signal with a tight enough filter around 1× RPM will separate the belt speed multiple from the shaft 1× RPM vibration.
- Resonance: A rotor operating at or near its natural frequency can be difficult to balance and may not stay balanced. A natural frequency at or near the operating frequency can increase the vibration force at 1×RPM by as much as 40× or more.
Download our Unbalance & Vibration infographic a reference guide to unbalance conditions. Pair it with our advanced VIBWORKS Balancer to help you identify, correct, and avoid the unwanted consequences of equipment unbalance!
What is the Most Important Piece of Information Needed for Vibration Analysis?
by Diana Pereda
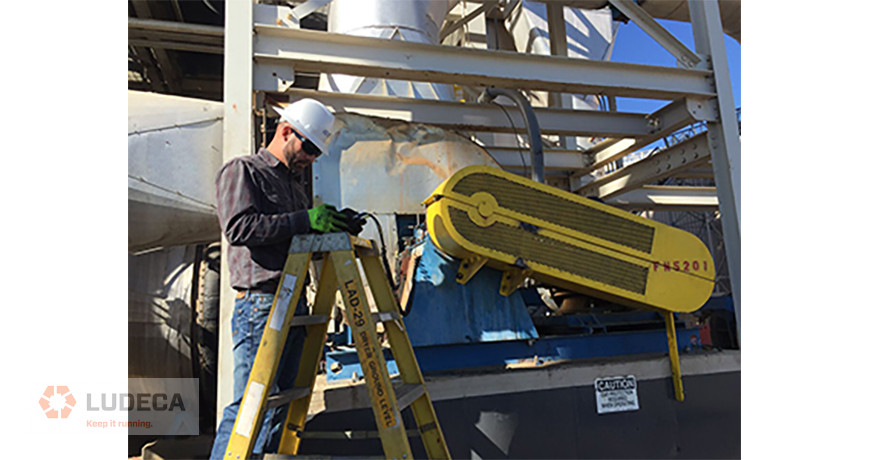
When performing a Dynamic Balance procedure a few things should be considered:
1. Inspect the structure/mounts and ensure there are no cracks or loose bolts.
2. If driven via a belt drive make sure that the belt is in good condition and properly tensioned.
• Remember that the second harmonic of a belt frequency can be very close to the rotational speed of the drive.
3. Inspect the rotating element for the build-up and clean as necessary.
• Remember that even the slightest build-up (i.e., dust) can be the cause of an unbalance.
4. If the rotating element is a blower, count the number of blades.
• Frequently correction weights will have to be attached to the blades and therefore it may be best to use a fixed location method.
5. If the equipment is down when you arrive, replace the reflective tape or attach new tape as may be required.
• This will ensure accurate phase data.
6. When taking your initial phase data turn the averaging function off, if possible.
• Monitor the phase data for a brief time to ensure its stability. Doing this could identify potential problems.
7. Keep good documentation, keep written notes on what was found:
- Phase and amplitude data
- Number of blades
- Correction locations
- When weights were attached or removed
- How much weight was attached or removed
- Sensor placement
- Tachometer placement.
8. If the equipment is variable speed such as VFD drive or DC drive ensure that the speed is repeatable to within 5% or less run to run.
Download our 5-Step Balancing Procedure for a simple and effective procedure for doing field balancing!
by Gary James CRL
Unbalance is one of the most common causes of excessive vibration in rotating equipment. Components such as bearings, couplings, seals, and motors are brought to premature failure every day due to excessive vibration. Balancing is usually the first thing that comes to mind when these increases are noticed. But what causes a machine to become “out of balance”?
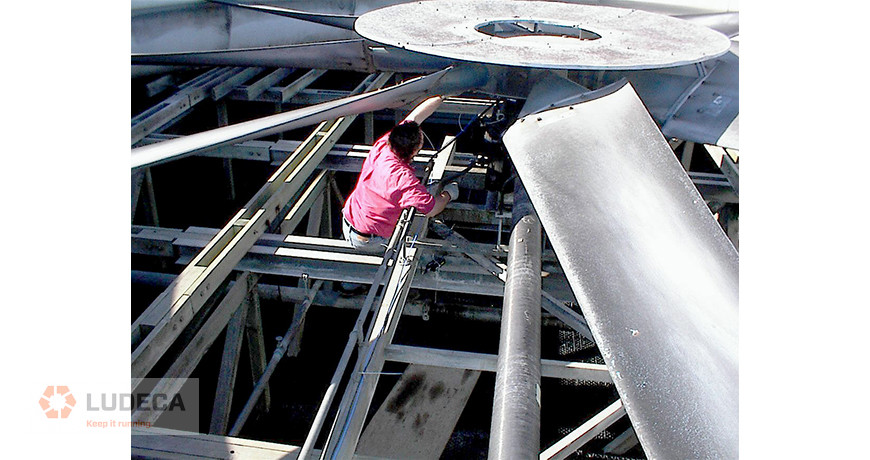
Here are the four most common reasons:
1) Build-up
Foreign debris or build-up from the process that is taking place at the facility can accumulate on rotating parts. At first this build-up may be unimportant, as the material builds up evenly across the surface of a rotating component. However, as build-up increases, there will eventually be pieces that fly off. At this point, the machine immediately becomes out of balance.
Although the increase in vibration may seem sudden when material lets go, the process of accumulating material build-up had been occurring for quite some time in most cases. We could assume that the rotating component was balanced at one time. Therefore, adding correction weights to restore the balance may not be the best option. Further loss of material build-up is bound to occur. The best option in these situations is to thoroughly clean the rotating components that have built up material contamination to restore balance.
The higher the RPM, the greater the effect the build-up will have on the equipment. It is always a good idea to make sure rotating equipment remains clean and clear of build-up, especially high-speed machines.
2) Loss of Previous Balance Weights
It is not uncommon for rotating equipment to throw a weight that was once added by a balance technician. These weights come in many forms such as C-clamp style with a set screw, clips, or nuts and bolts. On larger machines some technicians will use beam clamps and other makeshift components to achieve balance. Sometimes plate steel that was welded on during the balance process can give way and fly off.
The most worrisome part of this problem is the safety concern that comes with weights flying off rotating equipment. Furthermore, a sharp increase in vibration occurs when a weight lets go. Always be sure to use proper weights for each scenario. Welding, drilling and tapping, drilling and bolting, or using weights designed specifically for your equipment are usually a safe bet. Weights should always be applied in such a manner as to avoid flying off from centripetal force or extreme wear from any process material.
3) Material Loss
In many situations, rotating components can be susceptible to material loss. This loss can come from physical damage, chemical damage, corrosion, cavitation, abrasion or other damaging processes in your facility.
As machines run continually it is not uncommon for material loss to occur. As long as the component is inspected and deemed safe to run, it can be re-balanced to restore vibration levels to normal. However, it is always best to eliminate material loss by improving the process. Sometimes coatings can be applied to parts to reduce wear. Cavitation and other flow issues can be avoided by properly sizing equipment and positioning valves correctly.
It is always best to address the root cause rather than simply performing “band-aid” repairs.
4) Run-out
This is where it gets tricky. Sometimes a machine can be called out by a vibration analyst for a high 1× vibration that looks like imbalance. Technicians will be assigned to make the repair with a balance process. If run-out is the cause of the high 1×, balance weights will rarely correct the issue.
Run-out can also be thought of as a bend, bow, or eccentric bore.
Bend: Sometimes rotating equipment gets bent from physical damage or excessive belt tension. This will cause an increase in 1× vibration that looks like imbalance.
Bow: This can occur in large rotors that sit still for too long and develop a bow in the shaft from gravity. A bow can also be caused by temperature changes if the shaft material isn’t tempered or stress-relieved correctly.
Eccentric Bore: This is very common on new components. If the machinist bores a coupling or hub slightly off center, it will naturally be out of balance as it swings around. This too will cause an excessive amount of 1× vibration that looks like imbalance.
If you’re trying to balance a machine and can’t seem to make it better, consider using a dial indicator to identify run-out issues. Be sure to check each component in several different locations. If run-out is found, the correct course of action is repairing the damaged component, not adding balance weights to it.
As you can see, unbalance in rotating equipment isn’t always as simple as adding (or removing) mass. To improve the reliability of a machine, it is always best to think outside the box and look for the root cause of the issue.
Visit our Knowledge Center and check out our Balancing section for more resources and tools to help you understand machinery unbalance!
by Diana Pereda
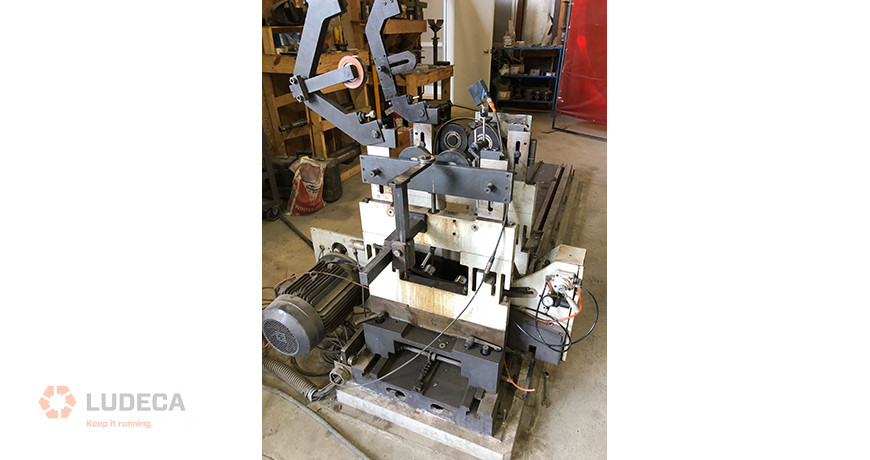
There are two primary types of balancing machines; a Soft Bearing Machine and a Hard Bearing Machine. Both types have advantages and disadvantages. Here are the differences:
Soft Bearing Balancer
A soft bearing balancer allows the rotor ends to move freely in the horizontal direction of the balancing stand. This type of balancer allows the rotor to turn at much slower speeds than the rotor’s operational speed. The balancing procedure is almost identical to field balancing and a calibration or trial weight is used to test the response of the rotor. In this way, each rotor balance is in essence self-calibrated. Like field balancing, multiple runs are required and the correction and trim weights are applied until the rotor meets the acceptance criteria. As long as the speed is above the resonance of the soft work supports, and not at the rotor’s critical speed, the response will be linear and very accurate. Some of the largest steam turbines in the country have been balanced using soft bearing work supports resting on railroad tracks. These rotors are balanced at speeds around 30 RPM. If one is concerned about the number of runs in a stand, then a hard-bearing machine might be preferred.
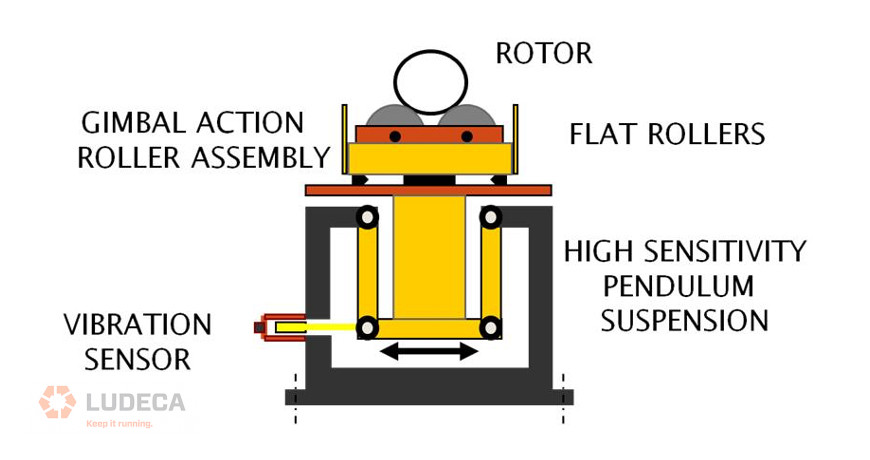
Hard Bearing Balancer
A hard bearing machine fixes the rotor ends to the balancing stand pedestals. This system only requires one run to determine unbalance and correction weights. A hard bearing stand measures force, rather than motion like the soft bearing machine. If one knows the force and angle of the unbalance plus the weight of the rotor, a correction can be calculated. The advantage is that only one run is required to determine correction weights. However, because the hard-bearing machine measures force directly, the accuracy is sensitive to speed. If the speed of a rotor doubles, the force increases by a factor of 4. Thus the higher the speed, the higher the measurable force and the better the accuracy of the balancing stand. One may be nervous about running rotors such as fans at higher speeds due to wind forces. In this case, a soft bearing machine would be better.
Download our 5-Step Balancing Procedure for a simple and effective procedure for doing field balancing.
Preparing for the Balancing Job: A Few Things to Keep in Mind
by Diana Pereda
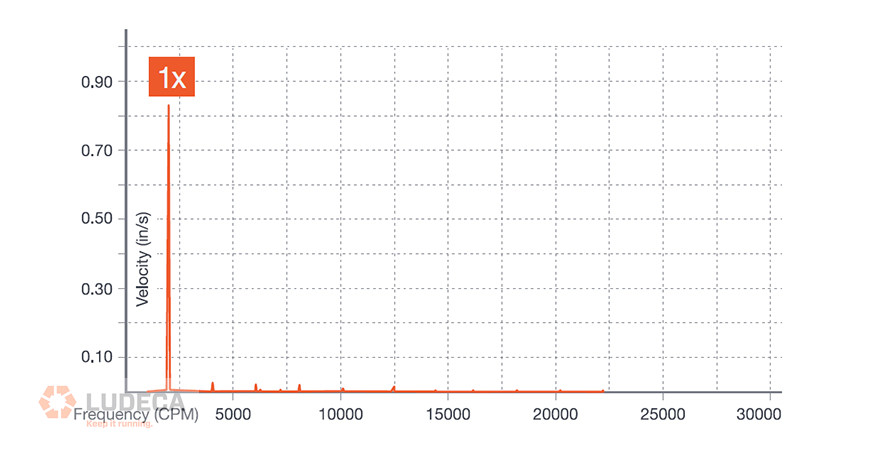
MYTH: “1x RPM is always caused by unbalance.”
TRUTH: Unbalance always causes vibration at 1x RPM. However, 1 x RPM is not always caused by unbalance. Many other problems can exhibit vibration at this frequency. Examples are Misalignment, Bent shaft, bowed shaft, cracked shaft, eccentricity, open rotor bars in the motor, rubs, looseness, belt issues, and resonance.
MYTH: “The run time and lifetime of the equipment can be extended by performing a balance job on the equipment.”
TRUTH: Problems such as misalignment, bad bearings, looseness, etc cannot be corrected by balancing the machine. It is almost impossible to correctly balance a machine that has other defects affecting its performance. Misalignment, bad bearings looseness, etc should be corrected before attempting to balance equipment.
Discover more about our VIBWORKS field balancer.
by Trent Phillips
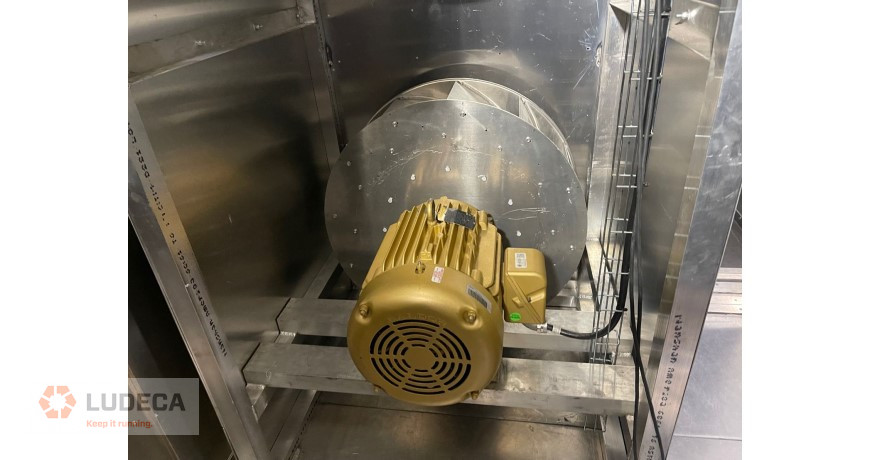
- All rotating equipment shall be designed and constructed so that its first critical speed is at least 125 percent of the maximum design speed for the equipment (i.e. rotating equipment shall operate at speeds less than 80 percent of their true critical speed). Unless otherwise required, equipment shall be balanced according to the recommendations given in this section.
- Equipment components such as motors, pump rotors, fan wheels, etc. shall be factory balanced both statically and dynamically, to meet the field balance requirements described below.
- All balance reports shall be referenced in inches per second (ips or in/sec), zero to peak. A balance report shall be provided for each piece of equipment tested.
- Balance of Critical Equipment:
All equipment located in areas that may be sensitive to process vibration shall be classified as “critical” equipment for the purposes of this standard.
b. Critical fans shall include all fans greater than 10hp (7.5 kW) located within a fab building including recirculating air fans, makeup air fans, and exhaust (scrubbed, solvent, and general) fans.
c. Factory balance of critical equipment: All critical equipment shall be factory balanced. Vertical and horizontal vibration shall be less than that shown in Table 3.8A for “Critical” equipment at all frequencies from 2 to 5000 Hz.
d. Field balance of critical equipment: Shall be checked following field installation to the same standard as the factory balance. Adjustments shall be made as necessary to bring them within the specified limits. A balance report shall be provided for each piece of equipment tested.
e. Rotors of all critical fans shall be whirl-tested to 125 percent operating speed and balanced to ASHRAE Standards or better.
f. All critical equipment shall be field tested in accordance with International Standard ISO 10816-1 and 10816-3 or the most current edition of ANSI Standard S2.41 by an independent third party after installation and under actual operating conditions. - For all equipment, measurements shall be taken on each bearing on all three axes: vertical, horizontal, and axial. Measurements shall be taken on the equipment bearing caps in three orthogonal directions: parallel to the shaft in the horizontal plane and perpendicular to the shaft in both the horizontal and vertical planes.

Balance Methods:
If weights are attached, they shall be either welded metal, bolted mass, or special heat-treated resin. Weights shall not interfere with the aerodynamic functionality of the machine. Weights shall not be attached to the fan or impeller blades, but instead to the side plane to which the blades/vanes are attached. Weights shall be attached at the farthest possible point from the centerline to minimize the amount of additional mass required to be added.
Materials used as balance weights shall be able to withstand the type of media in the system; dissimilar metals are not allowed due to corrosion problems.
Thank you Brian Franks with JetTech Mechanical for sharing this very educational information with us!
Download our 5-Step Balancing Procedure a simple and effective procedure for doing field balancing.
Preparing for the Balancing Job: A Few Things to Keep in Mind
by Diana Pereda

Unbalance can be caused by many possibilities such as listed below but not limited to just this list. Possible sources could be many more than those listed. Generally, if the rotor is dirty, clean it, as this alone may correct any unbalance. If it has damage fix it; if it’s loose tighten it, if a fit is not correct then correct it, etc.
- Machining tolerances and fits allowing assembly error.
- Improper fits of components on shafts
- Eccentric components
- Part bored off center
- Incorrect assembly
- Improper keyway length
- Voids in castings
- High porosity in the casting
- Wear and corrosion
- Abrasive material being moved
- Thermal or mechanical distortion
- Equipment improperly stress-relieved or heat treated
- Foreign matter
- The material being moved has a high adhesive factor and it sticks to the rotating mass until it reaches a point where it begins to come off
- Structural damage such as bent or broken components
- Something in the system has broken and traveled through the rotating element and caused damage
- Loose parts
- A component has loosened up or was improperly tightened originally.
by Ana Maria Delgado, CRL

The following facts are principles that form the basis for the balancing of machinery.
When a person determines that a rotating machine needs to be balanced, a few things should be kept in mind
- The vibration caused by imbalance always occurs at 1× RPM of the unbalanced rotor.
- The vibration is directly proportional to the amount of unbalance. Doubling the amount of the unbalance doubles the amount or amplitude of the vibration.
- A shift in the heavy spot results in an equal shift in the phase angle.
- All weights in a single plane can be summed vectorially to equal a single heavy spot.
- The amount of unbalance is measured in mass and distance from the center of the rotor (radius); e.g., oz./in., gm./in., or gm./cm. Increasing the weight or the radius increases the amount of force the unbalance generates in direct proportion.
- Rotors operating below their first critical are called rigid rotors. These can be balanced in any two planes. Rotors operating above their first critical are called flexible rotors and may require balance weights in more than two planes.
Preparing for the Balance Job
Once you have determined through careful analysis that imbalance is the forcing function and that field balancing is needed, your initial preparations should include:
- If the rotor has significant environmental material or process material adhering to the surfaces, then have it thoroughly cleaned. The rotor may return to acceptable balance conditions when clean.
- Check all hold-down/mounting bolts for looseness.
- Mount vibration transducers at the bearing. The transducers should be rigidly mounted to the bearing, never hand-held, and should not be moved during the entire process.
- Provision to read phase within 5°. Take phase readings from one shaft reference throughout the balance operation, even if there is more than one correction plane. A rigidly mounted reference transducer, such as a laser tach or magnetic proximity pickup is preferred rather than a strobe, whenever possible.
- The operating frequency should be repeatable run to run.
- Assurance that the vibration and phase data are repeatable. If phase and amplitude from a balance run cannot be repeated, it may be due to loose parts, chips, water soluble lubricant, rust, water, or other types of foreign matter in the rotor.
- Availability of correction weights and a means of determining the weight.
The goal is for all variations in phase and amplitude to be due to changes arising from the movement or application of weights, not due to poor technique. Good technique will minimize the required runs and improve the final precision of the balance job.
Download our Unbalance & Vibration infographic a reference guide to unbalance conditions. Pair it with our advanced VIBWORKS Balancer to help you identify, correct, and avoid the unwanted consequences of equipment unbalance!
What Causes Machinery Unbalance? Here are 10 Factors Preventing a Successful Balancing Job
by Diana Pereda
Unbalance occurs when a rotor’s center of rotation does not correspond with the center of the rotational mass. Simply stated, there is a “heavy spot” on the rotating element.
Mass is seldom evenly distributed throughout a rotor. Equal distribution of mass is not required for the rotor to be “balanced.” However, the mass variations should be distributed about the center of rotation so that the resulting centrifugal forces serve to counteract each other.
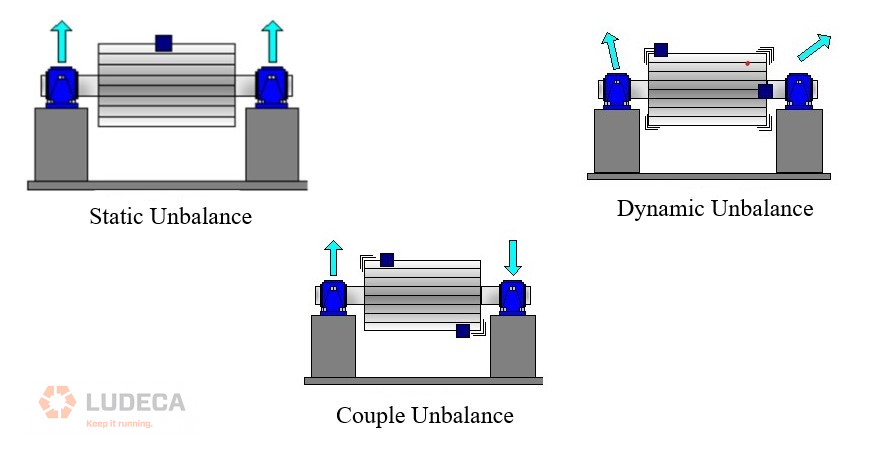
There are three types of unbalance:
- Static unbalance – The rotor has a single heavy spot that will “fall to the bottom” if the bearings have low friction.
- Couple unbalance – The rotor has two equal heavy spots located 180 degrees from each other on opposite ends of the rotor.
- Dynamic unbalance – The rotor is wide relative to the diameter and has two equal or unequal heavy spots, one on the drive end and one on the non-drive end, at different locations relative to each other, and not at 180 degrees opposite.
Download our 5-Step Balancing Procedure a simple and effective procedure for doing field balancing. Pair it with our advanced VIBWORKS Balancer to help you identify, correct and avoid the unwanted consequences of equipment unbalance!
Related Blog: 8 Keys to a Good Balancing Job
by Diana Pereda
Shop Balancing may involve the use of a balancing stand to spin either component, component assemblies, or rotors, so that these may be balanced prior to the final assembly or actual on-site installation. This type of balancing can also refer to the practice of balancing a completely assembled unit (fan, motor, pump, etc.) at the manufacturer, or repair facility, prior to shipment to a customer.

Field Balancing is the practice of balancing a machine after it has been installed on-site where it is to be used. Field balancing is not only a valuable procedure for equipment which has seen extended service in the field, but frequently for new installations or rebuilds, even when the rotor has been shop balanced. Operating frequency, rotor stiffness, the bearing support and its stiffness, load, and drive conditions all contribute to the final running condition of the assembly. Specifications which are met in the shop may not be satisfied on-site under final operating conditions. Once put into service, the rotor balance may change due to stress relieving, erosion, particulate buildup, etc.
The balancing of rotating assemblies in the field has several significant advantages:
- The rotor is balanced in its own bearings.
- The rotor is balanced at normal operating frequency.
- The rotor is balanced at normal load.
- The rotor is driven as it is driven during normal operation.
- Tear down, re-assembly, and re-alignment are not necessary.
- Downtime is greatly reduced.
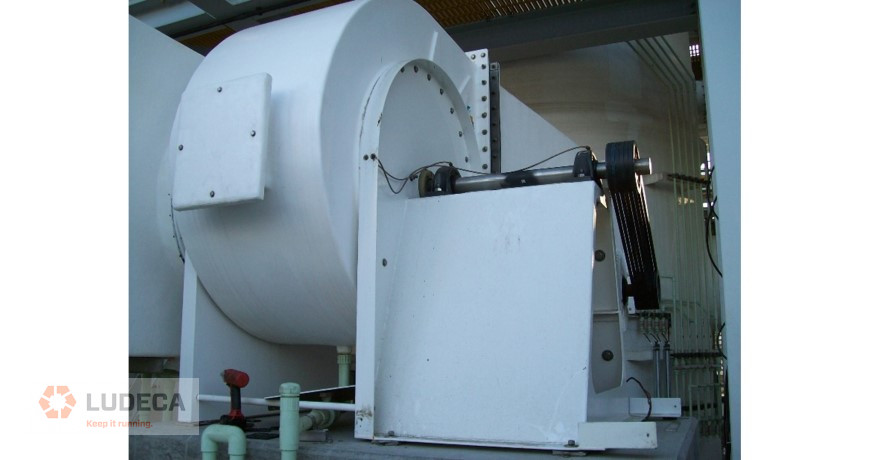
Download our 5-Step Balancing procedure for a simple and effective procedure for doing field balancing. Pair it with our 2-plane VIBWORKS Field Balancer to identify and correct unwanted consequences of equipment unbalance to achieve an optimal balancing job!
Related Blog: What it Takes to be Successful at Balancing
by Diana Pereda
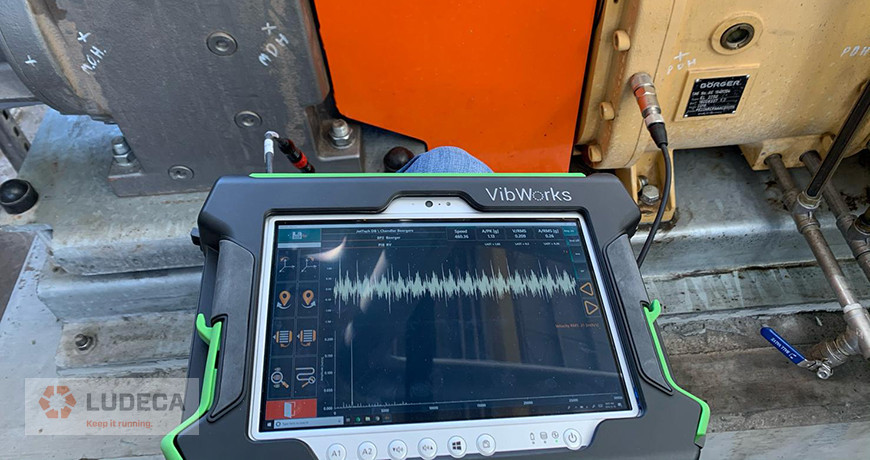
Unbalance occurs when the rotor’s mass is no longer at the center of rotation. Unbalance can be caused by many factors:
- Assembly error
- Machine tolerances
- Eccentric components
- Wear
- Corrosion
- Thermal distortion
- Mechanical distortion
- Material buildup
- Bent components
- Broken components
Likewise, many things can also prevent the successful correction of unbalance. Equipment resonance, bearing issues, product buildup, and other equipment problems can prevent a balancing job from being successfully completed. All equipment defects should be corrected before attempting to balance equipment.
Watch our Balancing Know-How: Diagnosing Unbalance video for a quick introduction to diagnosing machinery unbalance with vibration analysis. Pair it with our 2-plane VIBWORKS Field Balancer to identify and correct unwanted consequences of equipment unbalance to achieve an optimal balancing job!
by Diana Pereda
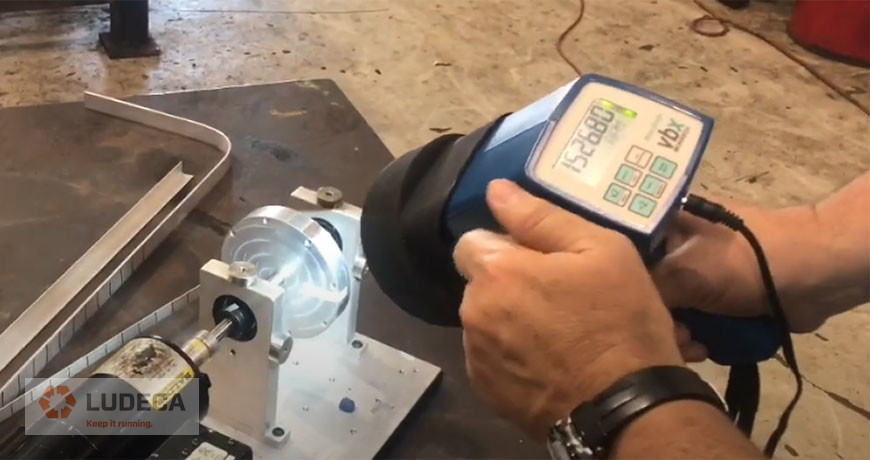
The use of a strobe light or stroboscope is another tool in the toolbox of the analyst in the field of Reliability. This tool can be used for a variety of purposes including checking or verifying the rotational speed of a component if the shaft or coupling is accessible.
The user can inspect it without stopping or shutting down the equipment. If the model of stroboscope the user has is capable of being triggered from an external source for the flash rate the user can move the flashing strobe around the machine’s moving parts to see which one appears to stop which can indicate that this is the source for the triggering and therefore the source of vibration.
Most stroboscopes have an output that can send a signal to a vibration instrument to be used as a tachometer input to the instrument. Dynamic balancing can be performed using a stroboscope instead of a laser, optical or infrared tachometer.
A key safety consideration is that one must remember when utilizing a stroboscope that rotating structures (such as shafts or couplings) only appear to be frozen or stopped when the stroboscope flash rate is synchronized to the same frequency as the shaft’s rotational speed.
People who are not familiar with stroboscopes have reached out to touch what appears to be a stopped shaft and become seriously injured. When using a stroboscope and the machine has not been started the user can use a marker and place a horizontal mark on one side of the shaft and a vertical mark on the opposite side so when the machine is running and you adjust the internal oscillator in the stroboscope to match the rotating shaft’s frequency you will either see a vertical or a horizontal mark; if you see a plus sign then the flash frequency is either half or double the shaft frequency.
For a sample on how a strobe light is applied for Synchronous Peaks vs. Non-Synchronous Peaks, watch this video from our partner, Karl Hoffower with Failure Prevention Associates, LLC
by Diana Pereda
A balancing tool is simply anything that serves the analyst for the purpose of statically or dynamically balancing a rotating piece of machinery.
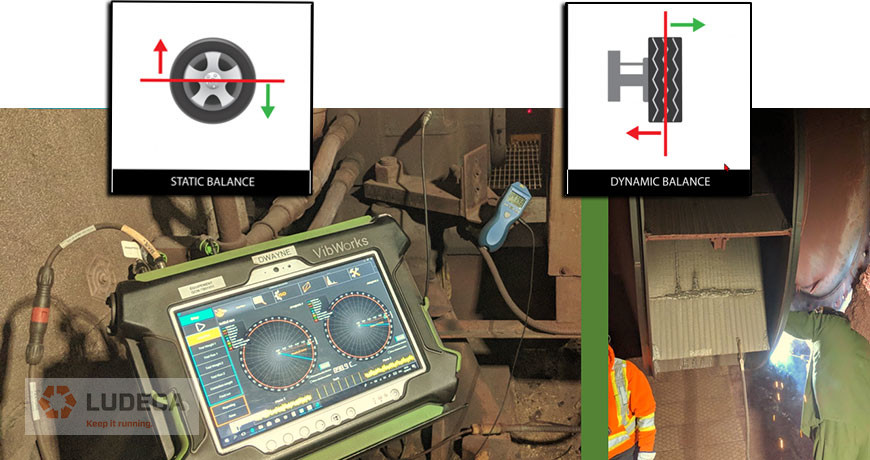
Precision balancing should include:
- An instrument capable of reading data from different types of vibration sensors, including accelerometers, velocity sensors, and proximity probes among others.
- It should also be able to display the rotational speed of the machine and the phase angle of the unbalance. The instrument should have a tachometer or a stroboscope input to measure a target on the rotating component indicating the rotational speed in CPM/RPM/Hz.
- The analyst would also need to have a way of measuring the exact amount of weight that they may need to add or remove from the rotor for the purpose of balancing and a way of attaching those weights. These could include clamping with set screws or bolts, bolts and washers, welding of plate material, and here care must be taken to ensure the metallurgy of the machine is not compromised.
- The instrument the analyst is using should include a software program that the analyst is familiar with. The time to learn a balancing program is not in the field while trying to perform a balancing job. If the analyst does not have a program for balancing he or she should be able to graphically plot out the balance solution as necessary. This approach is usually slower and more error-prone.
- The cables that connect the sensors and the tachometer to the instrument should be of adequate length to be safely installed. There should also be thought about how to attach the sensors and tachometer to the equipment so they do not become detached during the balancing process.
- The analyst should also have a way to document the balancing process.
To help you implement balancing at your facility, download our 5-Step Balancing Procedure a simple and effective procedure for doing field balancing!
by Diana Pereda
While in Louisville, KY after the #SMRP19 conference, I took a tour of the Angel’s Envy bourbon distillery and was thrilled not only by their fine bourbon finished in port wine barrels but by their attention to safety and unique promotion of safety all around their clean facility. Their clever “Heaven can wait. Safety first” statement obviously applies to all maintenance activities but in this particular case, shown in my photo, it was used to emphasize the importance of lock-out and tag-out procedures, also known throughout our industry as LOTO.

It reminded me of what we assiduously preach in all of our training courses: always lock out and tag out your machines before beginning any alignment procedure or balancing procedure.
Unlike ultrasound testing, acoustic lubrication or vibration analysis, all of which check machine or facilities condition while up and running, alignment and balancing require machines to be shut down and properly locked out, to adhere to all safety regulations. Only then can the components be mounted on the shafts. This ensures the safe rotation of the shafts and alignment corrections to be made without risk of injury to maintenance personnel.

Thank you, Brian Franks with JetTech Mechanical for these great field photos featuring the Easy-Laser XT770!
I can’t stress enough the importance of safety during service or maintenance of machines and encourage you to develop more ingenious slogans like “Heaven can wait. Safety first” to draw more attention to this important concern within your plant.
Here are the six steps to follow for proper LOTO per OSHA 3120:
1. Prepare for shutdown;
2. Shut down the machine;
3. Disconnect or isolate the machine from the energy source(s);
4. Apply the lockout or tag-out device(s) to the energy-isolating device(s);
5. Release, restrain, or otherwise render safe all potential hazardous stored or residual energy. If a possibility exists for reaccumulation of hazardous energy, regularly verify during the service and maintenance that such energy has not reaccumulated to hazardous levels; and,
6. Verify the isolation and deenergization of the machine.
Source: Control of Hazardous Energy Lockout/Tagout. OSHA 3120 – 2002 (Revised)
A personal note for Bourbon lovers: if you haven’t already, try pairing dark orange chocolate with your favorite bourbon, what a delicious combination! Heaven can wait. Please drink responsibly.
by Ana Maria Delgado, CRL
There are a lot of aspects that need to be taken care of in condition monitoring. Field balancing is one of those. There are two types of balancing: static and dynamic. The first one deals with balancing in a controlled environment and another one is balancing a piece of equipment in the field under field conditions. When you have balanced an asset against a number of parameters, you know when there’s an unbalance in the equipment. There are different defects that can be caught using a balancing frequency or other parameter. There are a lot of causes for unbalance such as corrosion, part damage, assembly error, and other machining tolerance errors.
The equipment that we need in the field includes: a balancing tool—whether it’s traditional or some modern device—that does the job of balancing the machine. When you are evaluating a machine, you can run different analyses to know what needs to be done to fix the unbalance found in the machine. The standard procedure could be a process starting with calculating the amplitude of the unbalance, then coming up with a correction weight that can be attached to the piece of the equipment to balance the machine. You can try this method until you get the desired results. Download our 5-Step Balancing Procedure – A simple and effective procedure for doing field balancing.
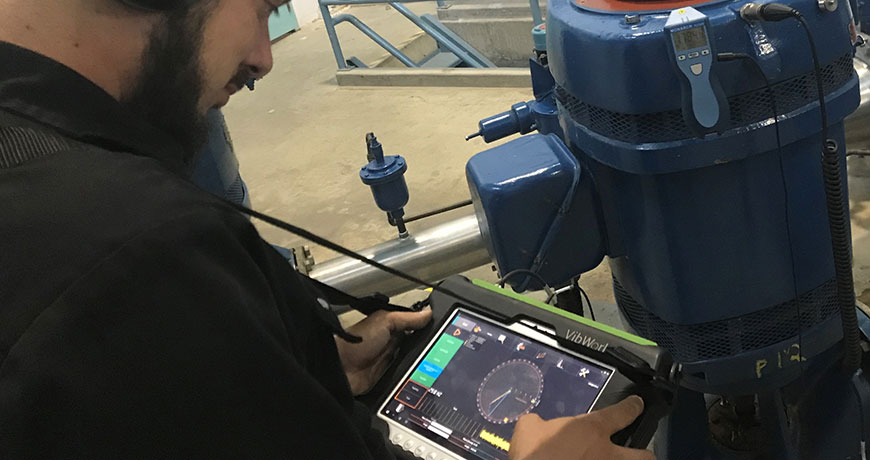
There are some standard specifications provided by ISO based on rotor weight and rpm of the machine. These provide general guidelines to check the balance of the machine but you can decide the specifications based on the evaluation of the rotor. When you are in the field, removing weight accurately is quite hard. It is very difficult to determine the exact weight you have taken out. Adding weight and keeping track of it is comparatively easy. Any person looking to start in field balancing should start with learning about graphic balancing and studying the tools.
Going with a proper alignment training course and field balancing training course would be the best choice, where you can learn to understand the problem, get to know the right tools, and learn from understanding the graphical examples. Customers always want to know the type of weights that you have used, their position, and how they are balancing the machine, so you should have that information at hand in the field. The technicians should know the resonance against different frequencies so that they can capture the right data and make decisions based on that to fix the issue right away.
A given piece of equipment doesn’t always need weight to balance it. Sometimes cleaning a dirty piece of equipment goes a long way. You have to make sure that the equipment is clean before you go about balancing the machine. You have to pay attention to your machine data, see what it is telling you, and then make an informed choice to eliminate the defects. You have to start with laying the groundwork first, like checking for soft-foot or rust that can throw off your readings. The best way to get it done is to let the programmers and providers work together to make necessary enhancement towards better field balancing.
Hear more from Gary James in this podcast by James Kovacevic and learn more about static & dynamic balancing differences, knowing resonance against different frequencies, and his advice and knowledge of field balancing.
by Diana Pereda
Vibration is everywhere! Vibration is a “back and forth” movement of a structure or component. Vibration can also be referred to as a “cyclical” movement. It can be inherent in a piece of equipment or can be induced by another form of energy. The real question is whether the vibration is detrimental to the equipment and its internal components.
Vibration is typically monitored through some form of analyzer, either online or offline such as the VIBWORKS analyzer.
What causes vibration? Here are just a few causes, but there are so more which can lead to elevated vibration levels. More importantly, if caught early enough, they can be corrected and thereby maximize the life of our equipment:
- Installation of the machines
- An improperly mounted bearing can cause severe vibration. This can lead to damage of the bearing as well as other components within the machine.
- Operation of the machine
- Pushing our machine beyond its recommended maximum output. Our machines respond by vibrating more than the recommended allowable limits and will eventually fail.
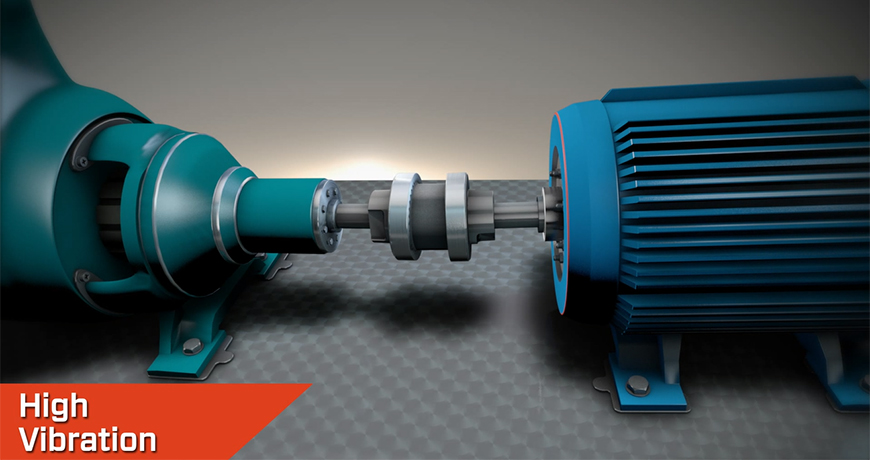
Watch our video ‘What’s Misalignment’ to learn more about the causes and effects of having misalignment in your rotating equipment
Some common machine problems that generate mechanical vibration:
- Misalignment
- Misalignment is one of the most common issues that leads to high vibration and eventually failure of the machine. It can be easily detected and corrected. Take the time to laser align machines properly to the recommended tolerance.
- Unbalance
- Unbalance is another easily missed problem that causes severe damage to our equipment. It can also lead to cracks of the housing itself. If not detected and corrected soon enough it can lead to dangerous catastrophic failure. Unbalance can be easily detected and corrected extending the life of the equipment.
We never have enough time to do things right the first time but always find time to do them again.”
These few issues can be easily detected with properly set-up software. Often, the setup is incorrect and inaccurate. Invalid data is captured in the FFT. Please consult an expert to make certain you are utilizing your condition monitoring software to its fullest potential. Remember… If it’s Critical and Rotates it should be Aligned, Balanced, and Monitored.
by Ana Maria Delgado, CRL
Just what does it take to be successful at balancing? Let’s start with some basics. First, you need to have an understanding of the balancing process, next nomenclature: is it unbalance, imbalance, out of balance, or what?
Use a consistent description and stick with it. Next, think about what the source of unbalance could be: is it uneven wear on parts? Voids within castings? Damage from impacting? Material buildup? Even though buildup is not usually a problem, when it begins to come off it rarely does so evenly thus creating an unbalance. In other words, unbalance is simply the uneven distribution of mass.
Simply review or collect data to ensure that the undesirable vibration is from unbalance and not some other issue such as a belt problem, misalignment, electrical issue, etc. Once you’ve determined that the vibration is indeed unbalanced you need to inspect the object to be balanced. If it is not clean, clean it. Look for damaged or broken parts. On belt-driven equipment inspect the belts as their frequency can be very close to running speed and can hinder the balance job. Make sure you have the proper tools for doing the balancing job, such as a balancing instrument capable of reading the vibration that is produced at running speed or what is commonly referred to as 1×or 1 times and capable of indicating the phase angle at 1×. This could involve utilizing an optical tachometer, laser tachometer, magnetic pickup or even a stroboscope. Some tachometers will require a piece of reflective tape on the shaft for the tachometer to read from and this might require stopping the machine if still in service.
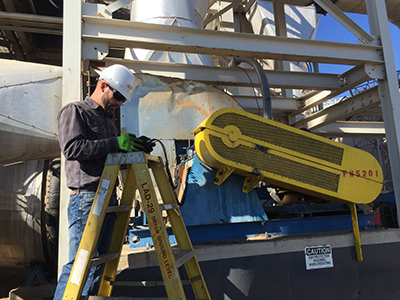
Tip: I try to place the tape horizontally, or along the axis of the shaft, with the leading edge of the tape on the trailing edge of the keyway. This can be helpful if you ever have to return for another balancing job on the same machine. You need to determine if you will be adding or removing material in order to balance the rotating component. If removing material, how will you determine how much you’ve removed; if adding weight, you need to make sure the weight you are adding is of a material that is compatible with the service the machine is exposed to. If adding material “weights”, how will they be attached? With set screws? Bolts? Clamps? Welded on? All this should be considered. One last tip: if after two runs you’re not there or almost there yet, you might need to stop and examine your process to ensure no mistakes have been made.
Download LUDECA’s 5-Step Balancing Procedure.
by Gary James CRL
As Published by Maintenance Technology Magazine September 2017 issue
If greater reliability and uptime are of any concern to you, then precision maintenance is a key component in achieving it. This means having clear and simple, yet meaningful, procedures in place for the different tasks involved. Two such tasks are precision alignment and balancing. LUDECA’s 5-Step Procedures will help guide your facility and maintenance staff to achieving precision maintenance.
Get your own copy of these 5-Step Procedures:

Download 5-Step Shaft Alignment Procedure

Download 5-Step Balancing Procedure
Why is precision maintenance so important? The reasons are clear:
- Safety
The alignment and balancing procedures lay out the basic steps required to align and balance machines safely, reducing the risk of injury and increasing the likelihood of a quality outcome. Checklists simplify the workflow and serve to remind employees of the processes required to consistently and safely perform the precision maintenance task. - Reliability
Well-aligned and balanced machines run more reliably, with a greatly reduced probability of failure. This allows for better maintenance planning, greatly reduced repair and maintenance expenses, increased uptime, and more profits. - Efficiency
A good alignment procedure ensures that machines are aligned to the proper tolerances for the running condition of the machines, taking into account such things as thermal growth and anticipated positional changes. This ensures that the greatest efficiency is achieved in your running machinery, prolonging their health and reducing power consumption. Studies have shown that well-aligned machines result in a 3% to 10% reduction in power consumption. Noise and heat generation are reduced, producing a safer work environment. - Production Quality
Good alignment and balancing result in better product quality since vibration is minimized, resulting in more uniform and higher product quality. Unexpected breakdowns in production machinery may lead to costly waste from scrappage and high restart costs for the production line. - Training & Procedural Consistency
Once implemented, a procedure ensures all employees involved in the activity face clear and consistent expectations and processes, leading to a better understanding between all staff in the facility. Training expenses can be reduced since often only refresher training is required to update understanding of the technology utilized as updates are rolled out. Records should be kept that document employee training.
The next step in precision maintenance and reliability is the Implementation of formal specifications that detail every step in a task from safety to activity process to documentation, to ensure that anyone involved can follow the procedures and guidelines without confusion, and reach the desired outcome for all machinery types in the plant. Such specifications typically take from two to three months to develop and a further two to three months to roll out and fully implement. LUDECA has written a number of these specifications for customers worldwide. Let us help you as well.
by Alan Luedeking CRL CMRP
Guest Post by Bob Dunn from I&E Central, Inc.
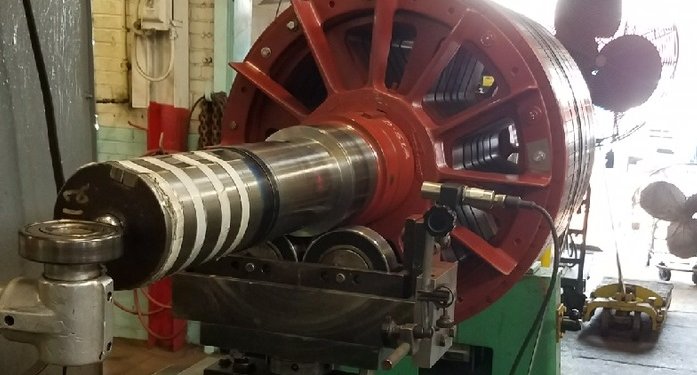
A customer was having difficulty balancing the rotor shown above. They had made multiple corrections, some contradictory, and were worse than when they started. In that this is on a shop stand and under controlled conditions, something was not right. Looking at the photo, I saw a couple of likely issues.
- The shaft is pretty reflective itself, it is doubtful that they were getting a good or consistent phase reading. I recommended they put a ring of black tape on the shaft, with the reflective tape on the black.
- The tach sensor is pointing at the shaft at about a 90-degree angle. Optical sensors and reflective tape works better if the sensor is aimed at an angle – 30 degrees or so.
- The tach sensor is pretty close to the rotor. In this case, it is not too close, but you can be too close. A sensor like this will work from several feet away, if you are having problems, try moving the speed sensor further away.
The customer applied the tape and adjusted the tach position. The rotor was balanced in a single run.
by Yolanda Lopez
Proper equipment function requires a properly aligned and balanced machine. Allowing a machine to operate with an unbalance condition can result in bearing damage, cracks, loose components, and many other costly maintenance issues. Loose debris can dislodge and impact the balance quality of a machine. Debris buildup on the impellers/blades, and other rotating parts can create unbalance conditions. Before balancing the machine it is very important that the rotating surfaces (blades, etc.) are cleaned of any debris. Removing buildup will help ensure that the machine can be properly balanced and remains in a balanced condition.
by Trent Phillips CRL CMRP - Novelis
