Reposted from Easy-Laser®
The latest addition to Generation XT, Easy-Laser® XT660, gives you access to four different measurement methods for shaft alignment. Each with its own advantages. Read more to find out how to use them best!
The four measurement methods are 9-12-3, EasyTurn™, Multipoint, and Continuous sweep. Here we describe them individually so that you know when best to use them.

Method 1: 9-12-3
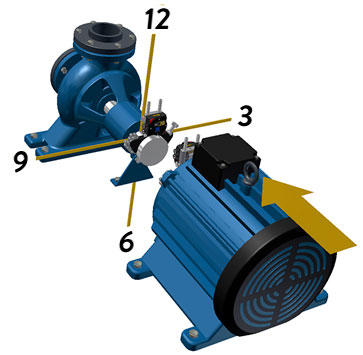
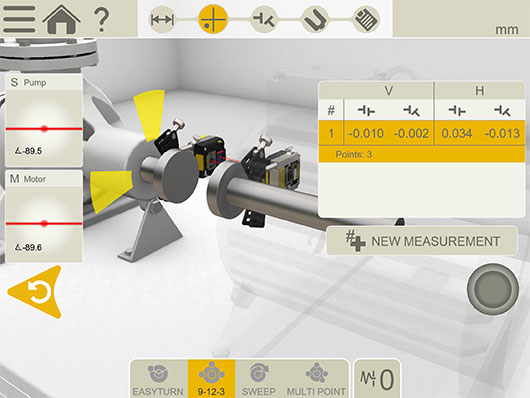
The clock method, or 9-12-3 as it is also known, is the origin of all shaft alignment. Anyone who knows how to use analog dial indicators will recognize this method. A dial gauge is mounted on each shaft, and the measurement values are taken at three different points, corresponding to the 9-12-3 positions on a clock, or the angles 0-90-180 of a circle. It is based on geometry (and trigonometry), more specifically circle mathematics. The mathematical assumption is that if we can measure the semicircle, we can then work out what the whole circle will look like, and consequently determine the center of the circle (rotational center) for both shafts. These centers can then be compared to each other and we can thus work out how well-aligned the machines are to each other. And with a laser-based measurement system, also obtain direct feedback from the adjustment of the machine in real-time.

When should this method be used? One answer is that this method can always be used when you are able to rotate the shafts freely, and there are no other physical obstructions preventing you from measuring from the 9-12-3 positions. However, the restriction is that you must position the measurement devices at 9-12-3 as accurately as possible and that the system does not use the built-in inclinometers to calculate the position (in other words, you must check this yourself).
There is, however, one application when you must use the 9-12-3 method; during shaft alignment on-board seafaring vessels. This is because the inclinometers would move in conjunction with the vessel’s movements on the waves, potentially corrupting the collected measurement values. We, therefore, recommend using the 9-12-3 method as the inclinometers are switched off.
Method 2: EasyTurn
EasyTurn is a unique further development of the 9-12-3 method, with the freedom to choose at which clock position (which angle) you start collecting measurement values. With the help of some mathematics, we can also restrict the total measurement range to 40 degrees full rotation. From a practical point of view, this means that you can use this method where there is limited possibility of rotating the machines, due to the lack of space around the shafts.
This method is the standard-setting in most Easy-Laser shaft alignment systems (except XT660, which uses ”Continuous Sweep” as the standard method, see below).

Method 3: Multipoint
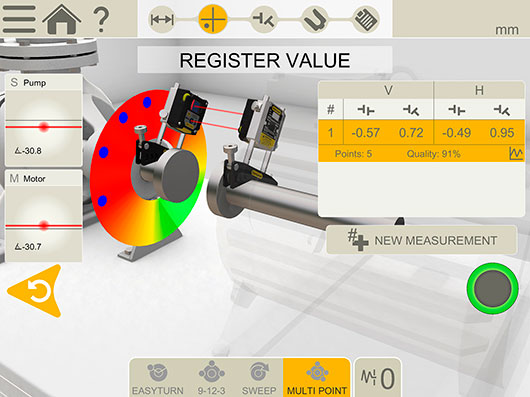
Multipoint is, in turn, further development of EasyTurn. Multipoint also means that you can start collecting measurement values from any clock position (angle), and complete collection across as small a rotation as 40 degrees. However, as the name suggests, this method means that values are collected from more than three points.
This is advantageous if taking measurements from larger machines where it is difficult to rotate the shafts. Collect the measurement values across a shorter rotation to increase the mathematical probability of obtaining good measurement values. This method also gives a quality evaluation of the measurement series. The evaluation takes into account shifts in temperature, measurement direction, and a number of measuring points.

Method 4: Continuous Sweep
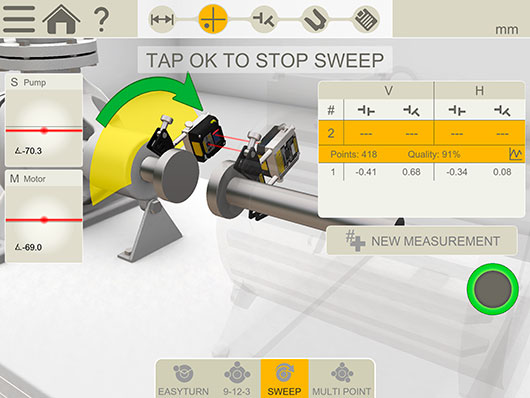
Continuous sweep can be described as Multipoint with automatic, continuous measurement value collection. In practice, this means that you can collect measurement values continuously with the measurement devices in motion. I.e. you start measurement value collection (at any clock position/angle) and then rotate the shafts without stopping, in one direction. Continue until you have collected enough measurement values to achieve a good quality calculation (quality evaluation is also performed here just as in Multipoint).

In the end, the shafts’ rotational center is calculated and presented graphically via images and text. This method is very useful in instances where it is difficult to stop the machines to take stationary measuring points, for example, when aligning large turbines.
We hope you now have a clearer picture of the various measurement methods and when best to use them.
The Easy-Laser XT Alignment App can be downloaded free of charge from the App Store and Google Play to try out.
Filed under:
Alignment by Ana Maria Delgado, CRL
