Measuring machinery misalignment with today’s tools, particularly computerized laser alignment systems, and well-designed bracketing is no longer as difficult a task as it once was when all you had were a straight edge, feeler gauges, and maybe a set of dial indicators with some make-shift hardware.
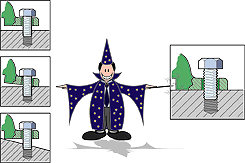
Why then, is it that aligning the machinery to given target values is so often still so cumbersome and time-consuming? There may be several reasons, among them unnecessarily tight tolerances specified by the machinery vendor, problems with worn-out bearings, inadequate bases, lack of jackscrews, etc. But by far the greatest obstacle to expeditiously reaching your alignment goal is soft foot. ‘Soft foot’, or machine frame distortion can be measured by various means, and indeed it must be measured and corrected before proceeding with the alignment. Why? Simply because an uncorrected soft foot condition will make alignment a trial-and-error procedure where indicated corrective shimming and lateral moves no longer bring you to the expected results.
Severe soft foot may also be quite harmful to the machinery itself.

Correcting soft foot may not be easy, but it is worth every minute you spend on it because once done, the alignment of the machines becomes a much easier task. Many alignment systems available today have soft foot measuring programs, and the most advanced system even features a soft foot ‘wizard’ which analyzes the type of soft foot measured (there are a number of different soft foot conditions) and suggests how to correct it.
Conclusion: If you want to make aligning your machinery easier, quicker, and more accurate, start by correcting soft foot.
Read: Types of Soft Foot
Filed under:
Alignment, Maintenance Tips by Ana Maria Delgado, CRL
