Reposted from Easy-Laser®

We had a little chat with Eskil Norberg at the company Maskincentrum, who has many years of experience in measuring and aligning machine tools for the manufacturing industry in Sweden.
Why is measuring so important?
Because you must be able to predict the level of precision you can achieve for manufactured parts, especially when it comes to large and complicated items, items that can be tough to measure, and also costly to recover if anything goes wrong.
Because you must be able to predict the level of precision you can achieve for manufactured parts, especially when it comes to large and complicated items, items that can be tough to measure, and also costly to recover if anything goes wrong.
What does your normal work procedure look like?
We always start with a thorough analysis of the problem and then continue by choosing the best method and instruments for the specific job.
We always start with a thorough analysis of the problem and then continue by choosing the best method and instruments for the specific job.
What type of guarantees do you give before performing a job?
That depends on each individual problem I would say. Normally we guarantee that we can identify the problem, and then present a solution for how to bring the machine to a level where it can produce within tolerance again.
That depends on each individual problem I would say. Normally we guarantee that we can identify the problem, and then present a solution for how to bring the machine to a level where it can produce within tolerance again.
Which measurement instruments do you use?
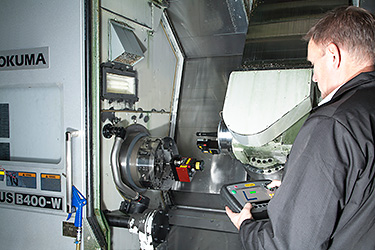
As I said, that depends on the problem, but for example an electronic precision level for leveling, an interferometer laser for distance, speed, pitch, and yaw measurements. Then a double ball bar for circular interpolation according to ISO 230-4. Easy-Laser® E940 is used for straightness, angles, and spindle pointing direction. It has wireless communication which is very convenient and safe for us because the machine can be run with all safety guards on. The system also provides a measurement report directly on site thanks to the built-in documentation possibilities. This is highly appreciated by the client. Then we also use vibration analyzers to check for unbalances, bearing failures, and sprocket damages.
As I said, that depends on the problem, but for example an electronic precision level for leveling, an interferometer laser for distance, speed, pitch, and yaw measurements. Then a double ball bar for circular interpolation according to ISO 230-4. Easy-Laser® E940 is used for straightness, angles, and spindle pointing direction. It has wireless communication which is very convenient and safe for us because the machine can be run with all safety guards on. The system also provides a measurement report directly on site thanks to the built-in documentation possibilities. This is highly appreciated by the client. Then we also use vibration analyzers to check for unbalances, bearing failures, and sprocket damages.
Can you give us an example of a successful job?
Of course. Recently when we aligned with our Easy-Laser® on a machine for the manufacturing of steel beams 6 to 12 meters long [20 to 40 feet] we improved the accuracy of the parts from near rejection, i.e. 100% of the tolerance range, down to 10 to 15% of the tolerance range.
Of course. Recently when we aligned with our Easy-Laser® on a machine for the manufacturing of steel beams 6 to 12 meters long [20 to 40 feet] we improved the accuracy of the parts from near rejection, i.e. 100% of the tolerance range, down to 10 to 15% of the tolerance range.
Anything else you would like to share with us on what is important when checking and aligning machine tools?
First, you must understand the effects that follow the different error conditions in the machine and how they affect the finished products. Always start from the ground up when adjusting the machine, followed by adjustments dependent on previous adjustments. What I try to say is you must adjust in the right order. You should also be aware of how possible electronic compensations affect the machine and its measurement result, so these don’t make the problem worse or maybe disguise any mechanical problem. So, always start from the ground up with the geometry of the machine, that’s my advice. To measure is to know!
First, you must understand the effects that follow the different error conditions in the machine and how they affect the finished products. Always start from the ground up when adjusting the machine, followed by adjustments dependent on previous adjustments. What I try to say is you must adjust in the right order. You should also be aware of how possible electronic compensations affect the machine and its measurement result, so these don’t make the problem worse or maybe disguise any mechanical problem. So, always start from the ground up with the geometry of the machine, that’s my advice. To measure is to know!
Filed under:
Alignment by Ana Maria Delgado, CRL
