A microchip manufacturer in the United States utilizes circular aluminum plates approximately 2 to 3 feet in diameter in the manufacturing process. These plates are heated from ambient temperature to +400 degrees F. The manufacturer wanted to ascertain if any distortion would exist across the surface of these plates when hot and if any differences in the flatness of the paste would occur between the cold and hot conditions of the plates.
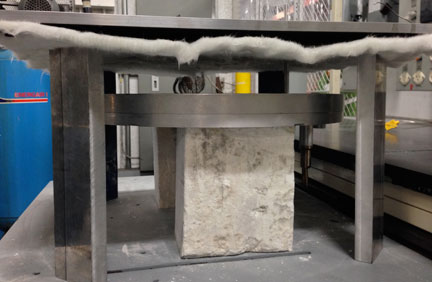
To measure this accurately, a ROTALIGN® ULTRA iS with LEVALIGN® EXPERT flatness option was used. The customer fabricated a steel jig to go over the aluminum plate. The jig was insulated from the bottom (see Figure 1.)

Fig. 1: Steel fixture with insulation placed over Circular Aluminum plates
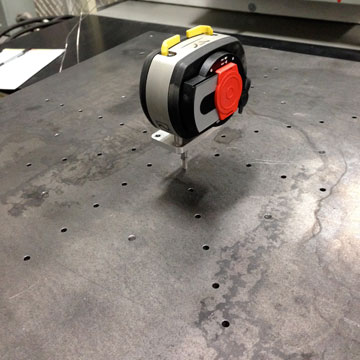
9mm holes +0.002″ were pre-drilled through the steel jig to allow the Levalign plunger bracket to fit freely yet snugly through the holes and make contact with the aluminum plate underneath. A standard circular measurement pattern was selected. The ROTALIGN ULTRA iS sensor was mounted on the plunger bracket to obtain the readings (see Figure 2.)

Fig. 2: ROTALIGN ULTRA iS sensor mounted on LEVALIGN flatness plunger bracket through holes in a steel jig
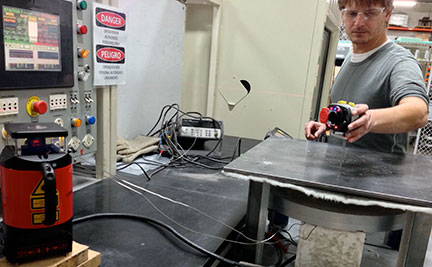
All readings were repeated to within 0.0001″ and fell within 0.0001” of what the customer thought they were. A thermal expansion of 0.020″ was measured from hot to cold, although the plate remained flat to ±0.002”. Figure 3 shows the measurements being performed.
Fig. 3: LEVALIGN EXPERT on the left and ROTALIGN ULTRA iS sensor during measurements
Although the original method used to perform these measurements was not disclosed to us, the customer did tell us that the ROTALIGN ULTRA iS with LEVALIGN EXPERT saved them many hours in the measurement process, and although no dollar savings from this process were mentioned, the customer immediately purchased the ROTALIGN ULTRA iS with LEVALIGN EXPERT, without hesitation.
Filed under:
Articles and Case Studies, Geometric Measurement by Steve Lochard CRL

